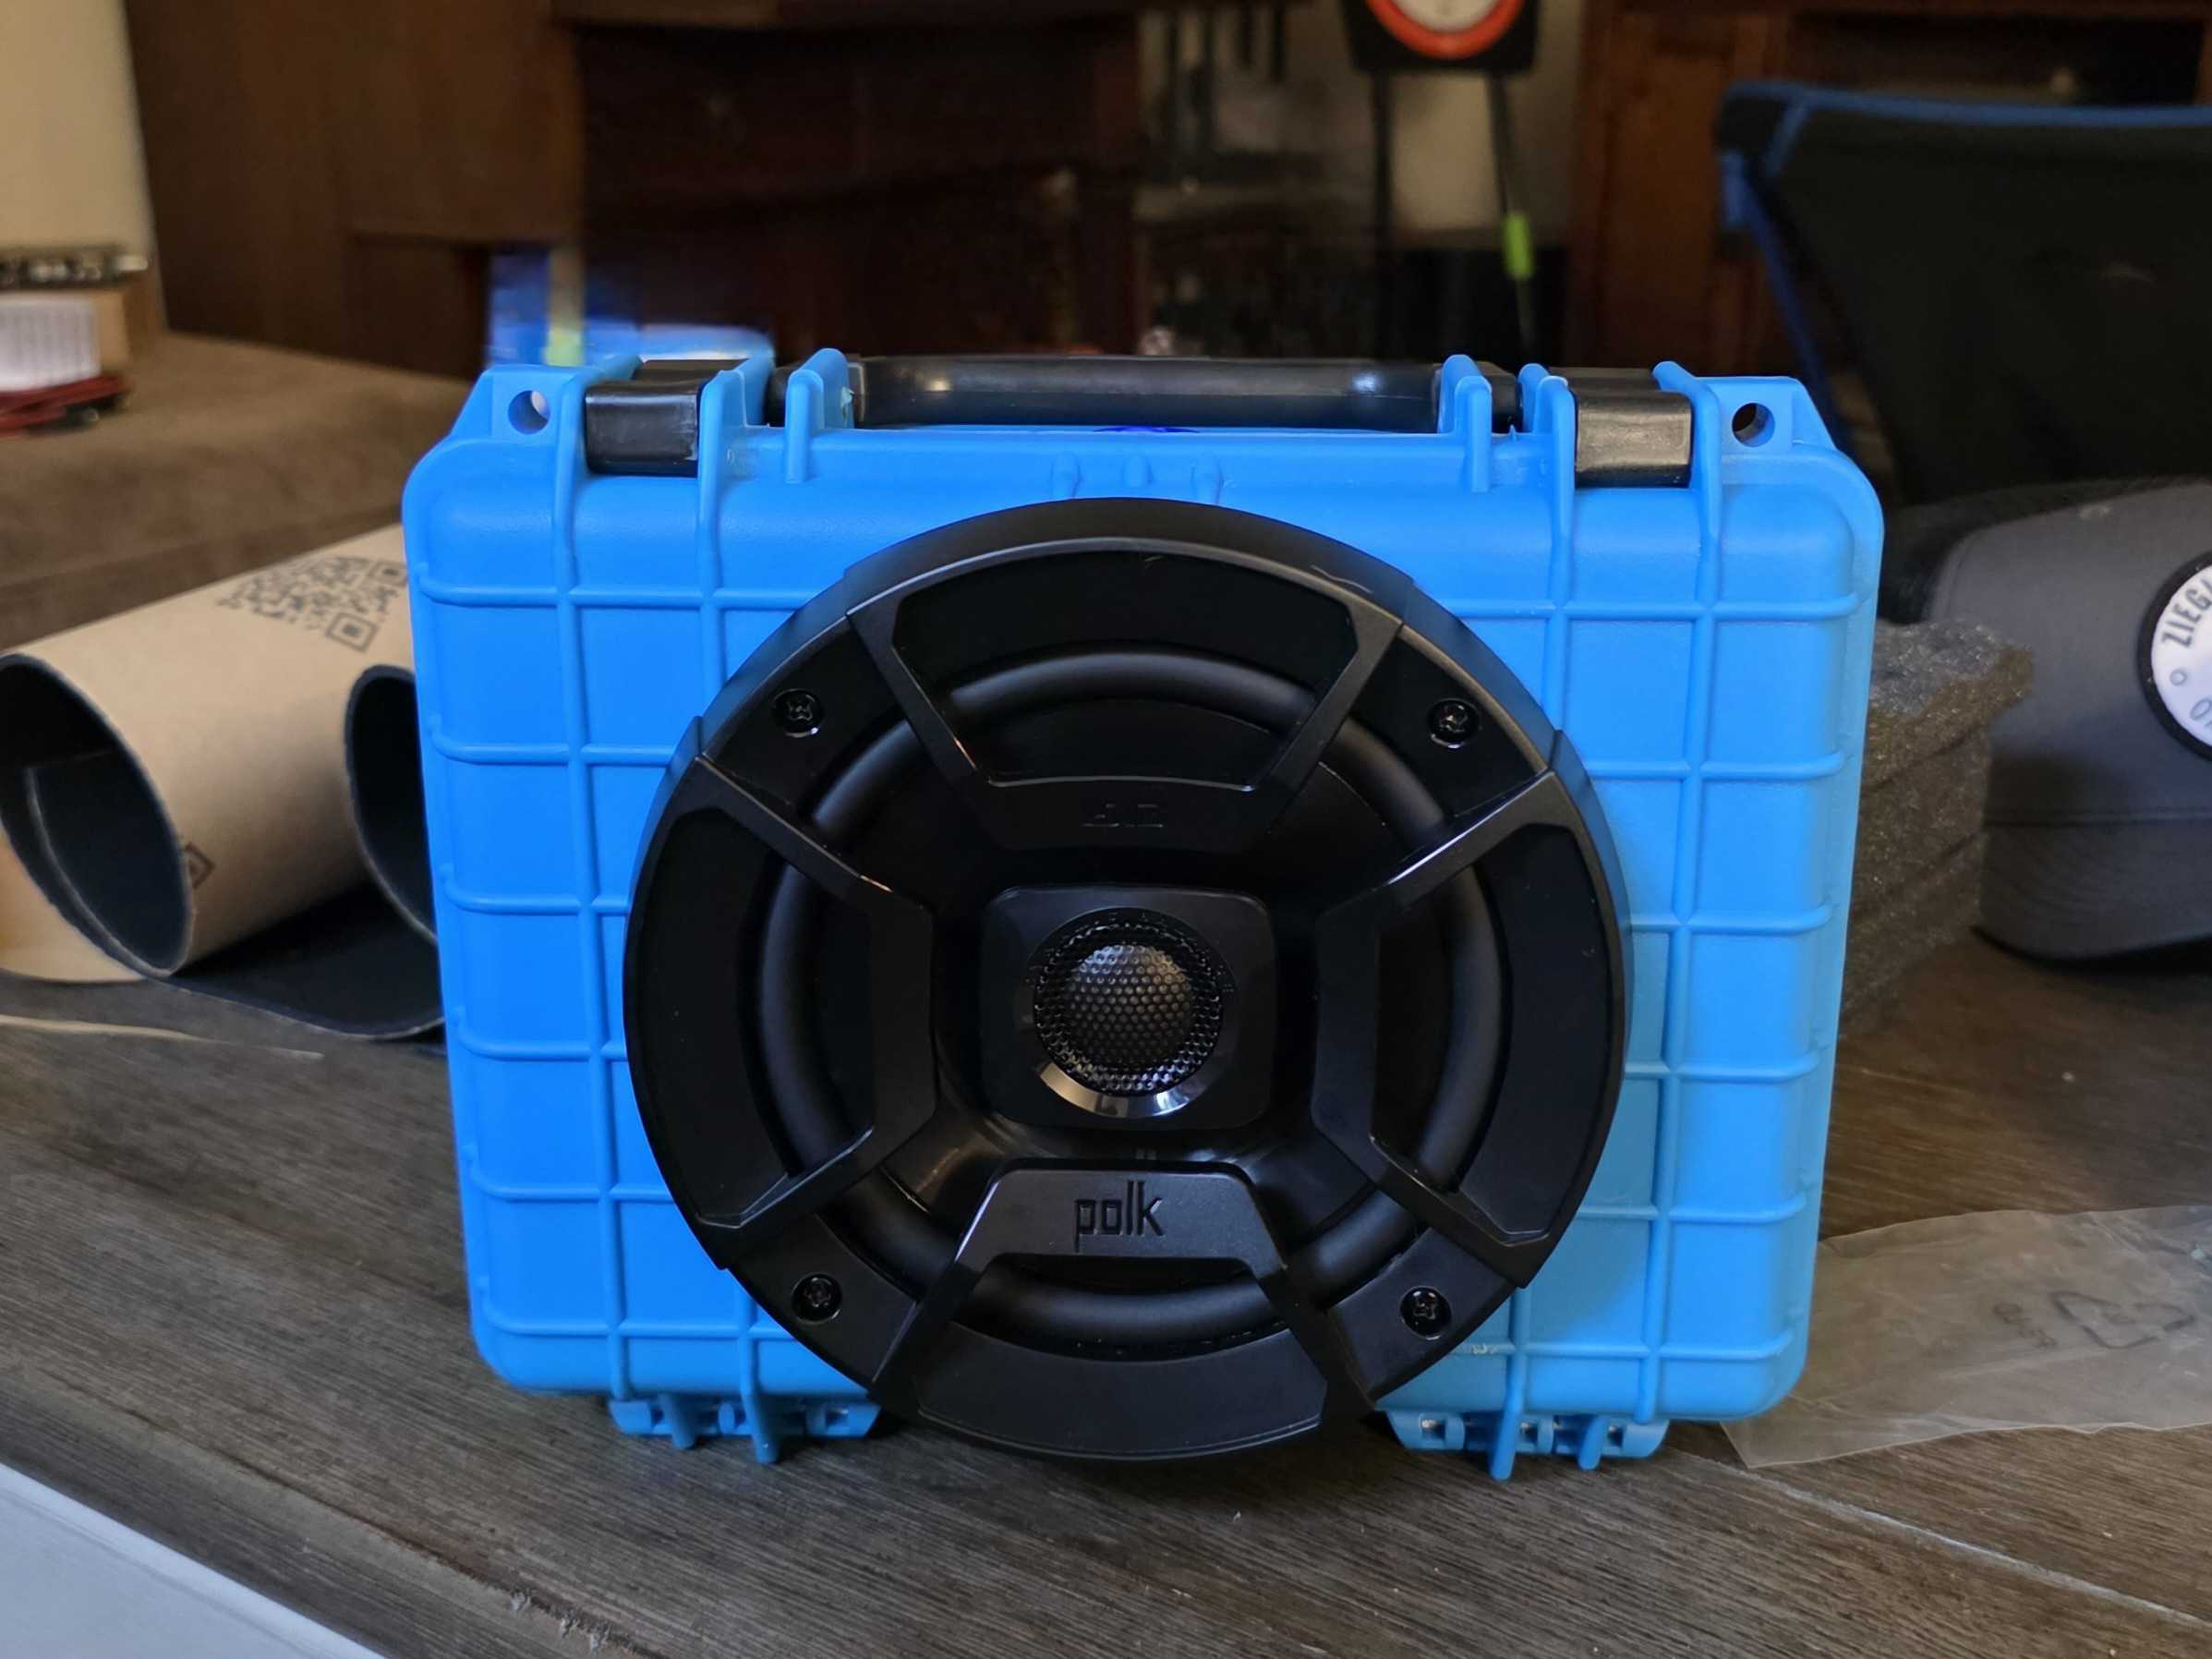
This build is a great mix of rugged and refined. We're starting with a Eylar 9" (same size as Apache 1800) case and dropping in a 5.25-inch Polk DB522 marine-rated speaker. If you've got a jigsaw, a drill, a bit of patience, and a taste for loud music, you're ready.
What You’ll Need (See Parts List for links)
-
Apache 1800 case or equivalent (Eylar 9" used)
-
A speaker of your choice (Polk DB522 used)
-
Jigsaw or hole saw (Dremel or rotary tool also works)
-
Dremel, angle grinder, razor or chisel for trimming
-
Butyl tape or Lexel sealant
-
Foil-backed butyl sound deadening (80 mil recommended)
-
Roller tool for sound deadening
-
Drill and step bit for external ports and switches
-
Amp: ZK-1001U used
-
Battery: KBT 12v 2.6Ah used
-
wiring, and accessories
-
Optional: 3D printed spacer for easier speaker mounting
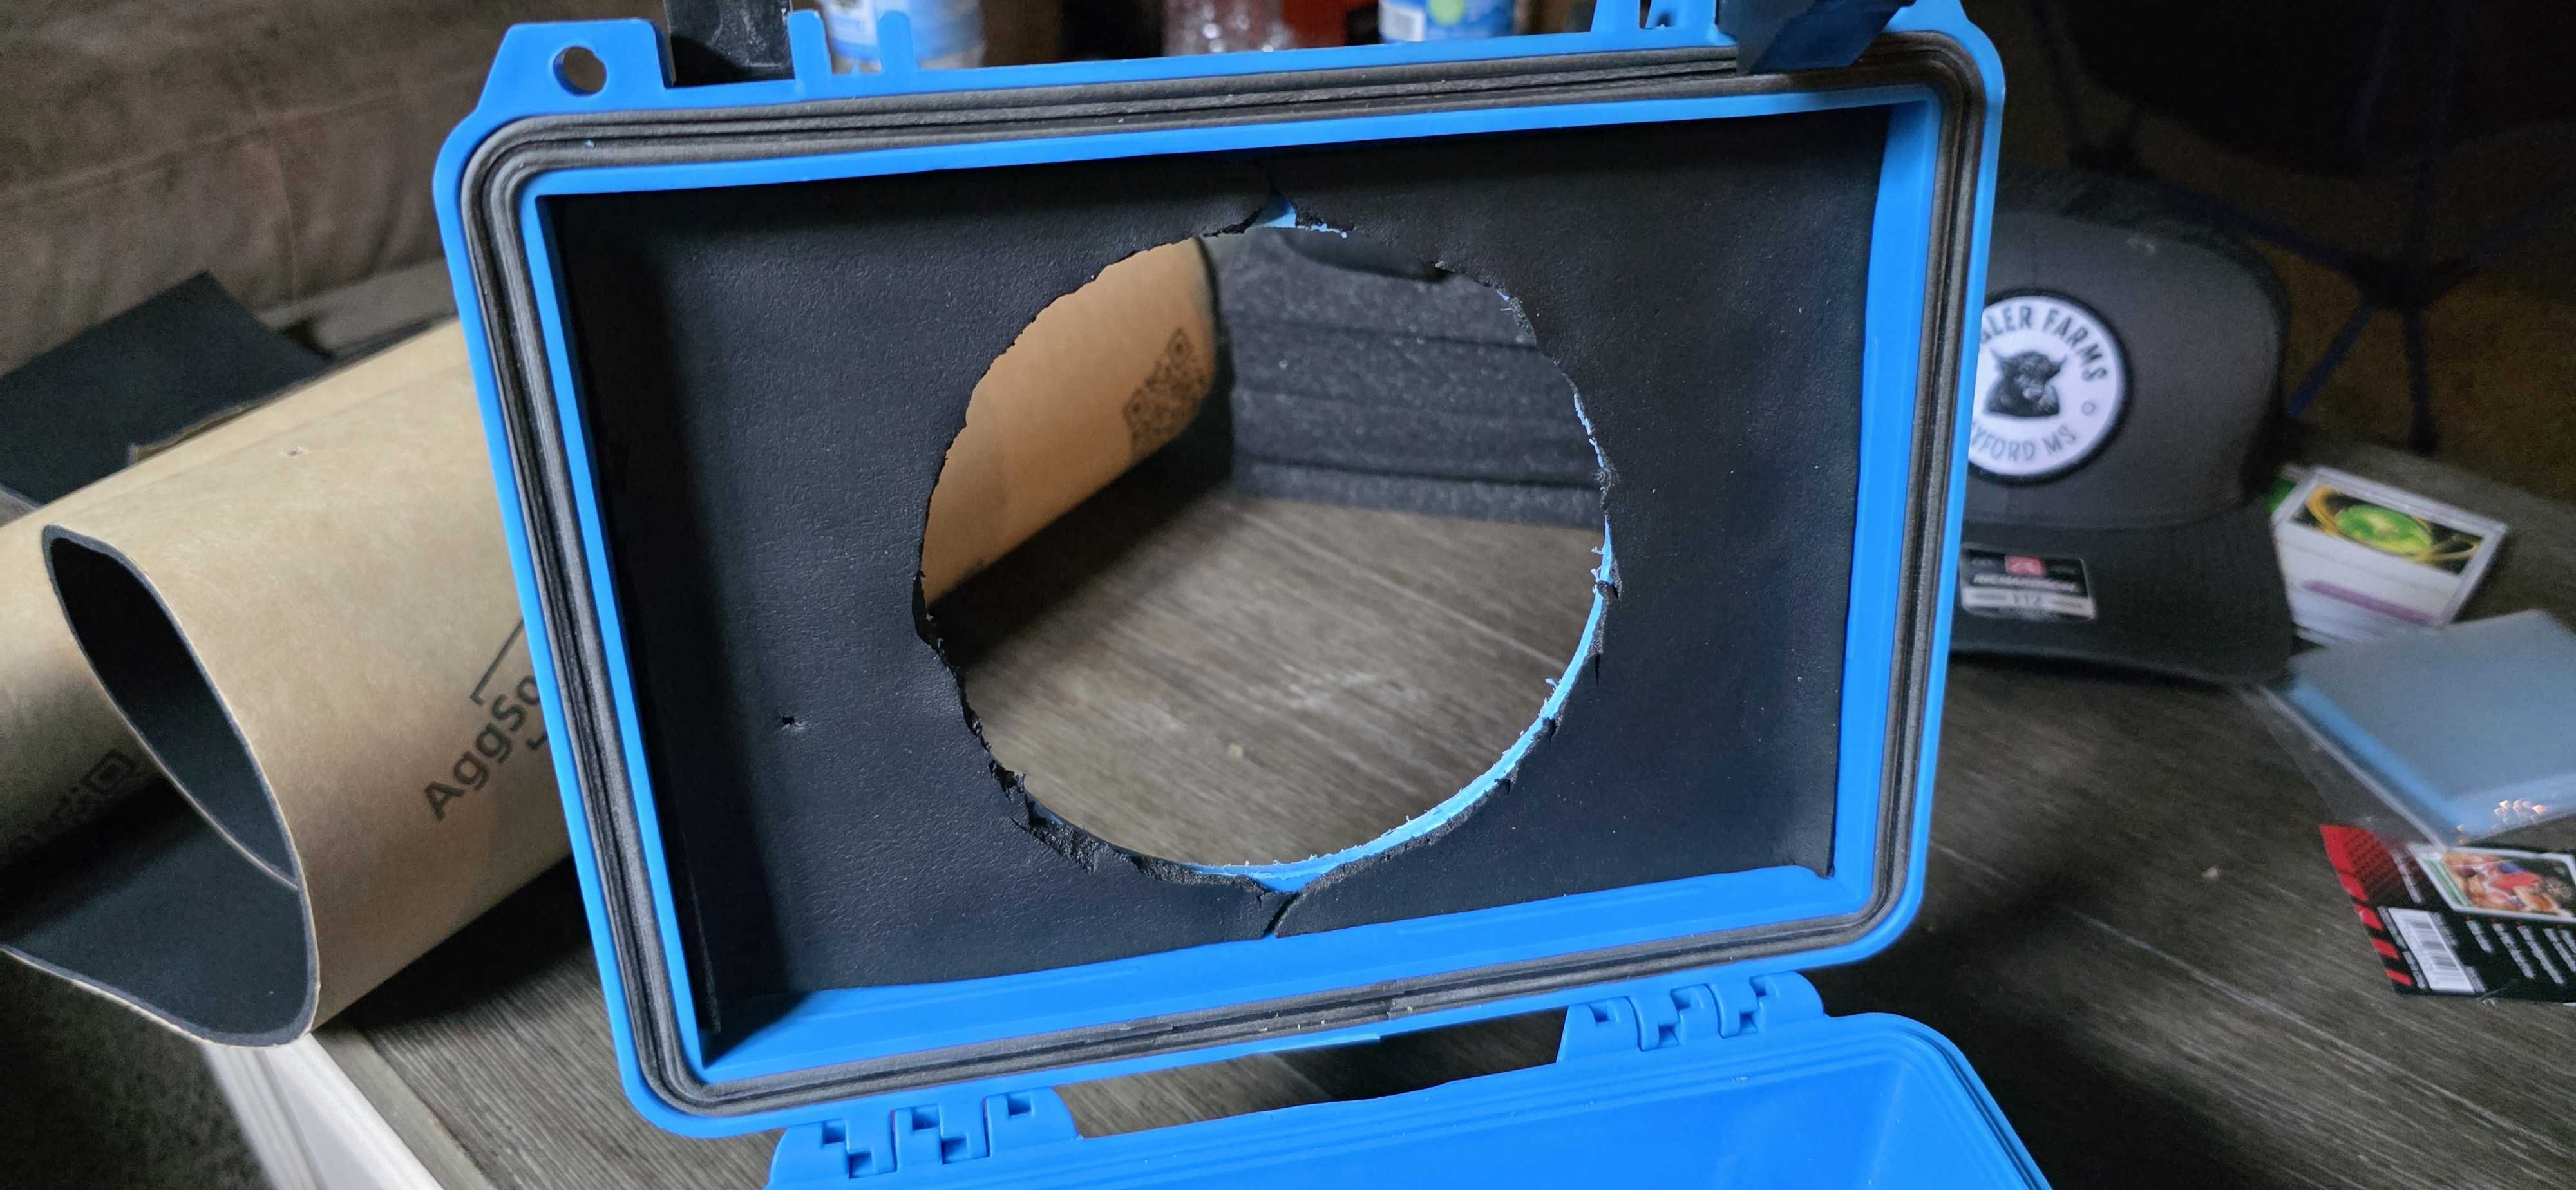
Step 1: Cut the Speaker Hole
Start by checking Polk's spec sheet to confirm the exact cutout diameter. It should be around 4.75 inches, but always measure your specific speaker.
Use your tool of choice to cut the hole in the lid of the Apache 1800. A jigsaw with a fine-tooth blade is a solid option, but a hole saw or Dremel works too. Go slow and steady. Clean up any rough edges when you're done.
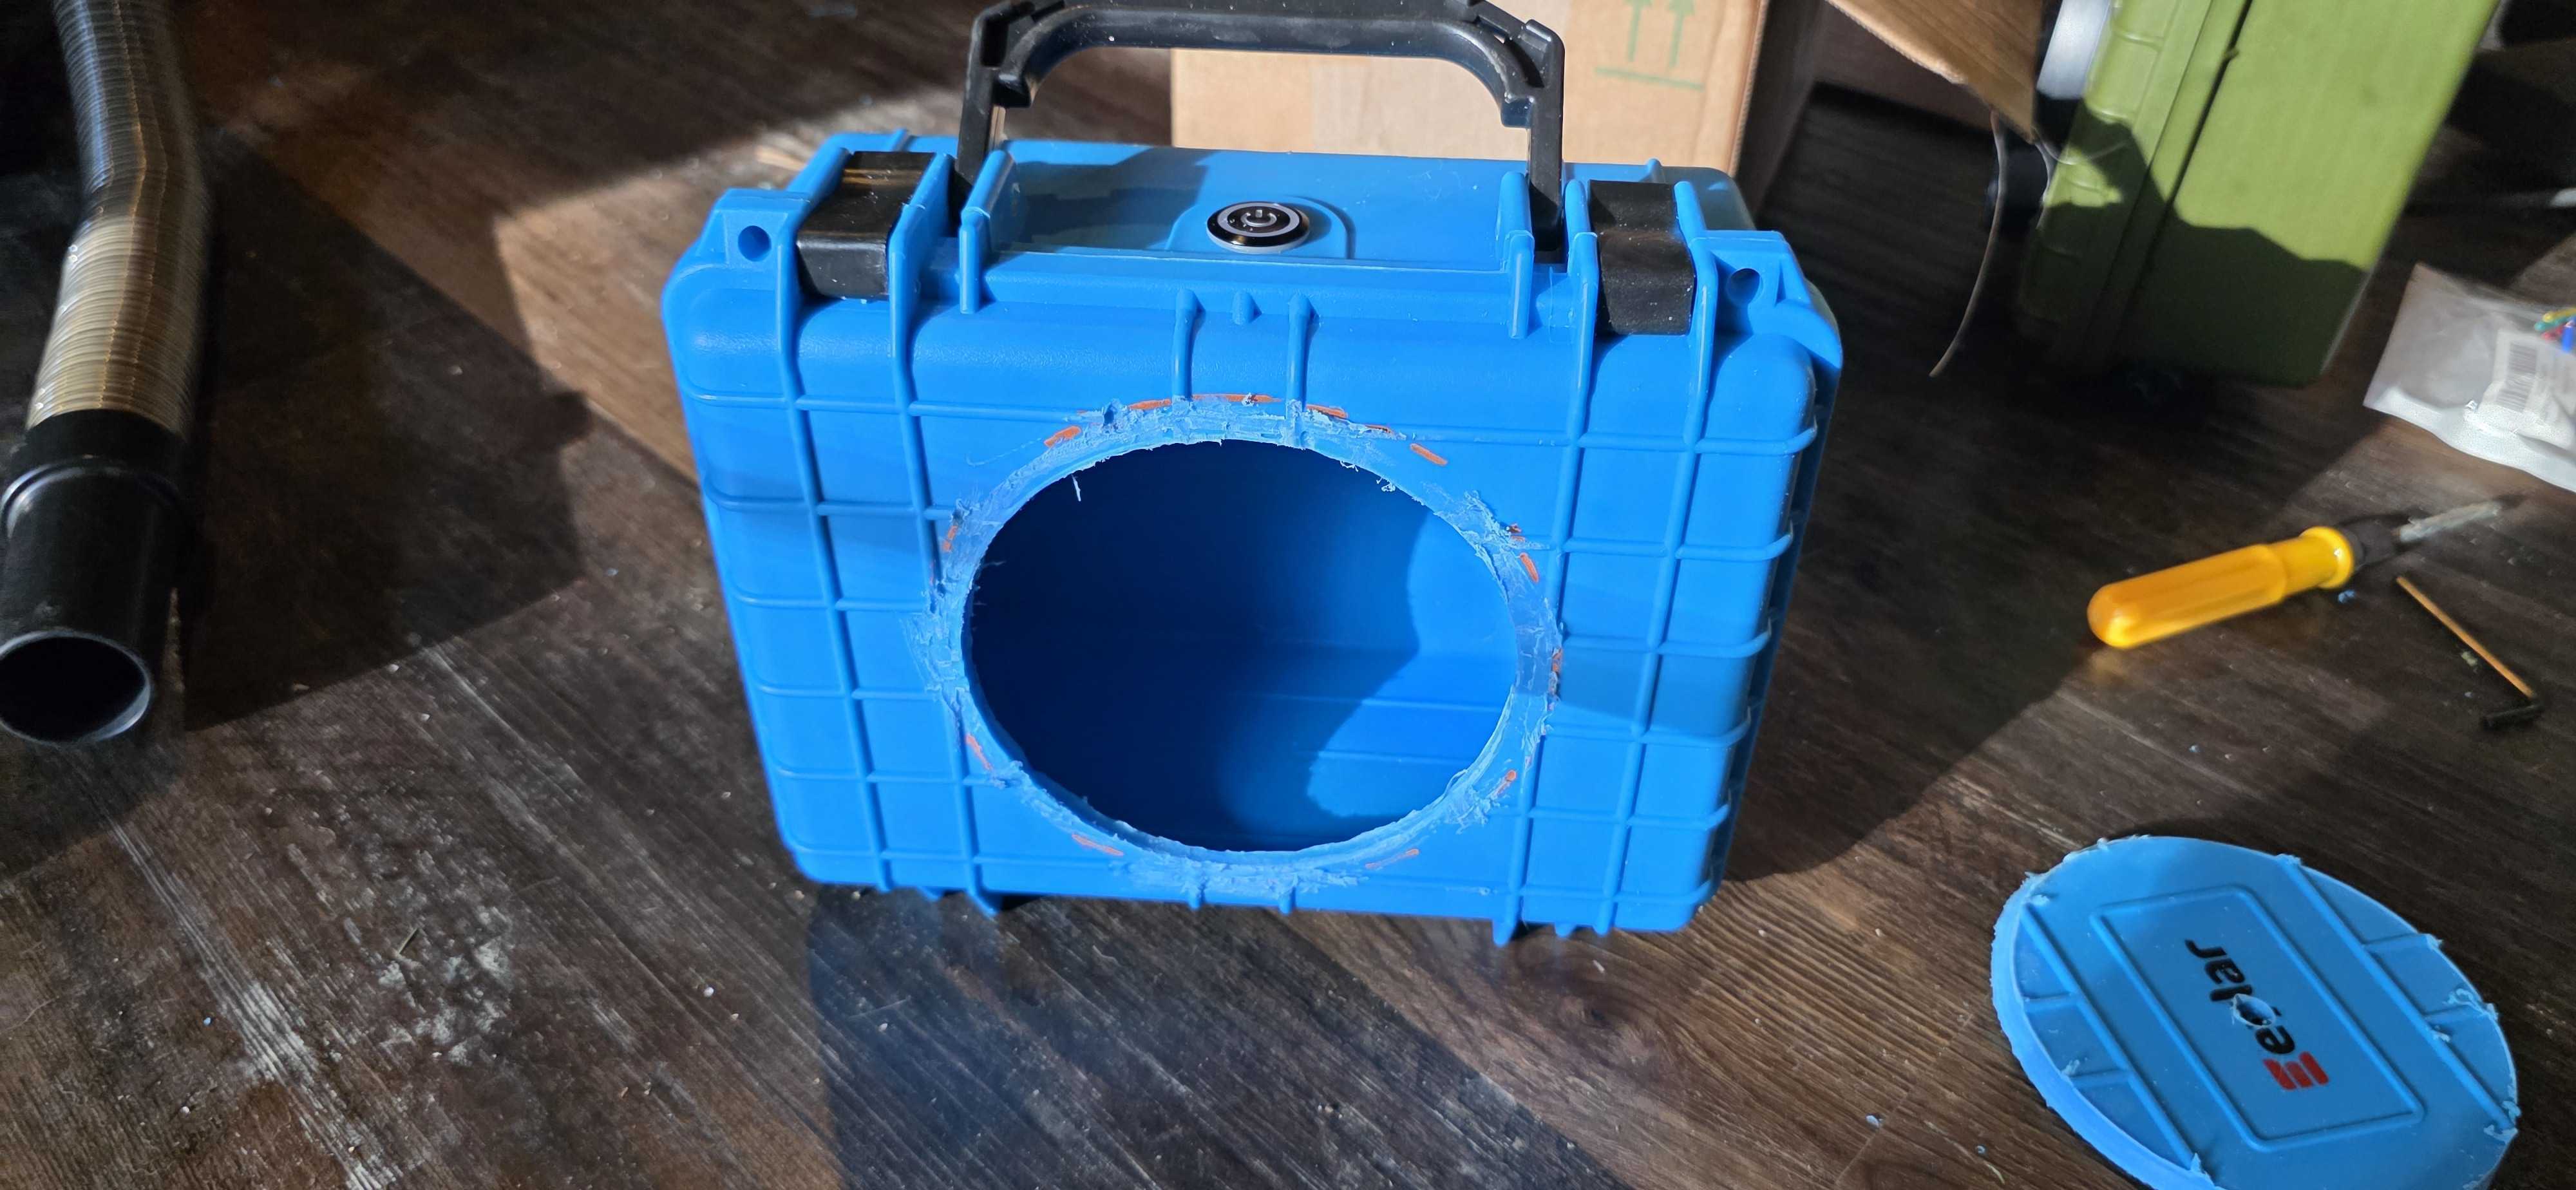
Step 2: Check the Fit and Mark the Ribs
Drop the speaker into the hole you just cut. You’ll notice the interior ribs of the case might prevent a flush fit. Use a marker to outline where the ribs interfere with the speaker's basket.
Skip this step entirely if you’re using a spacer. That keeps the speaker lifted above the ribs and simplifies the build.
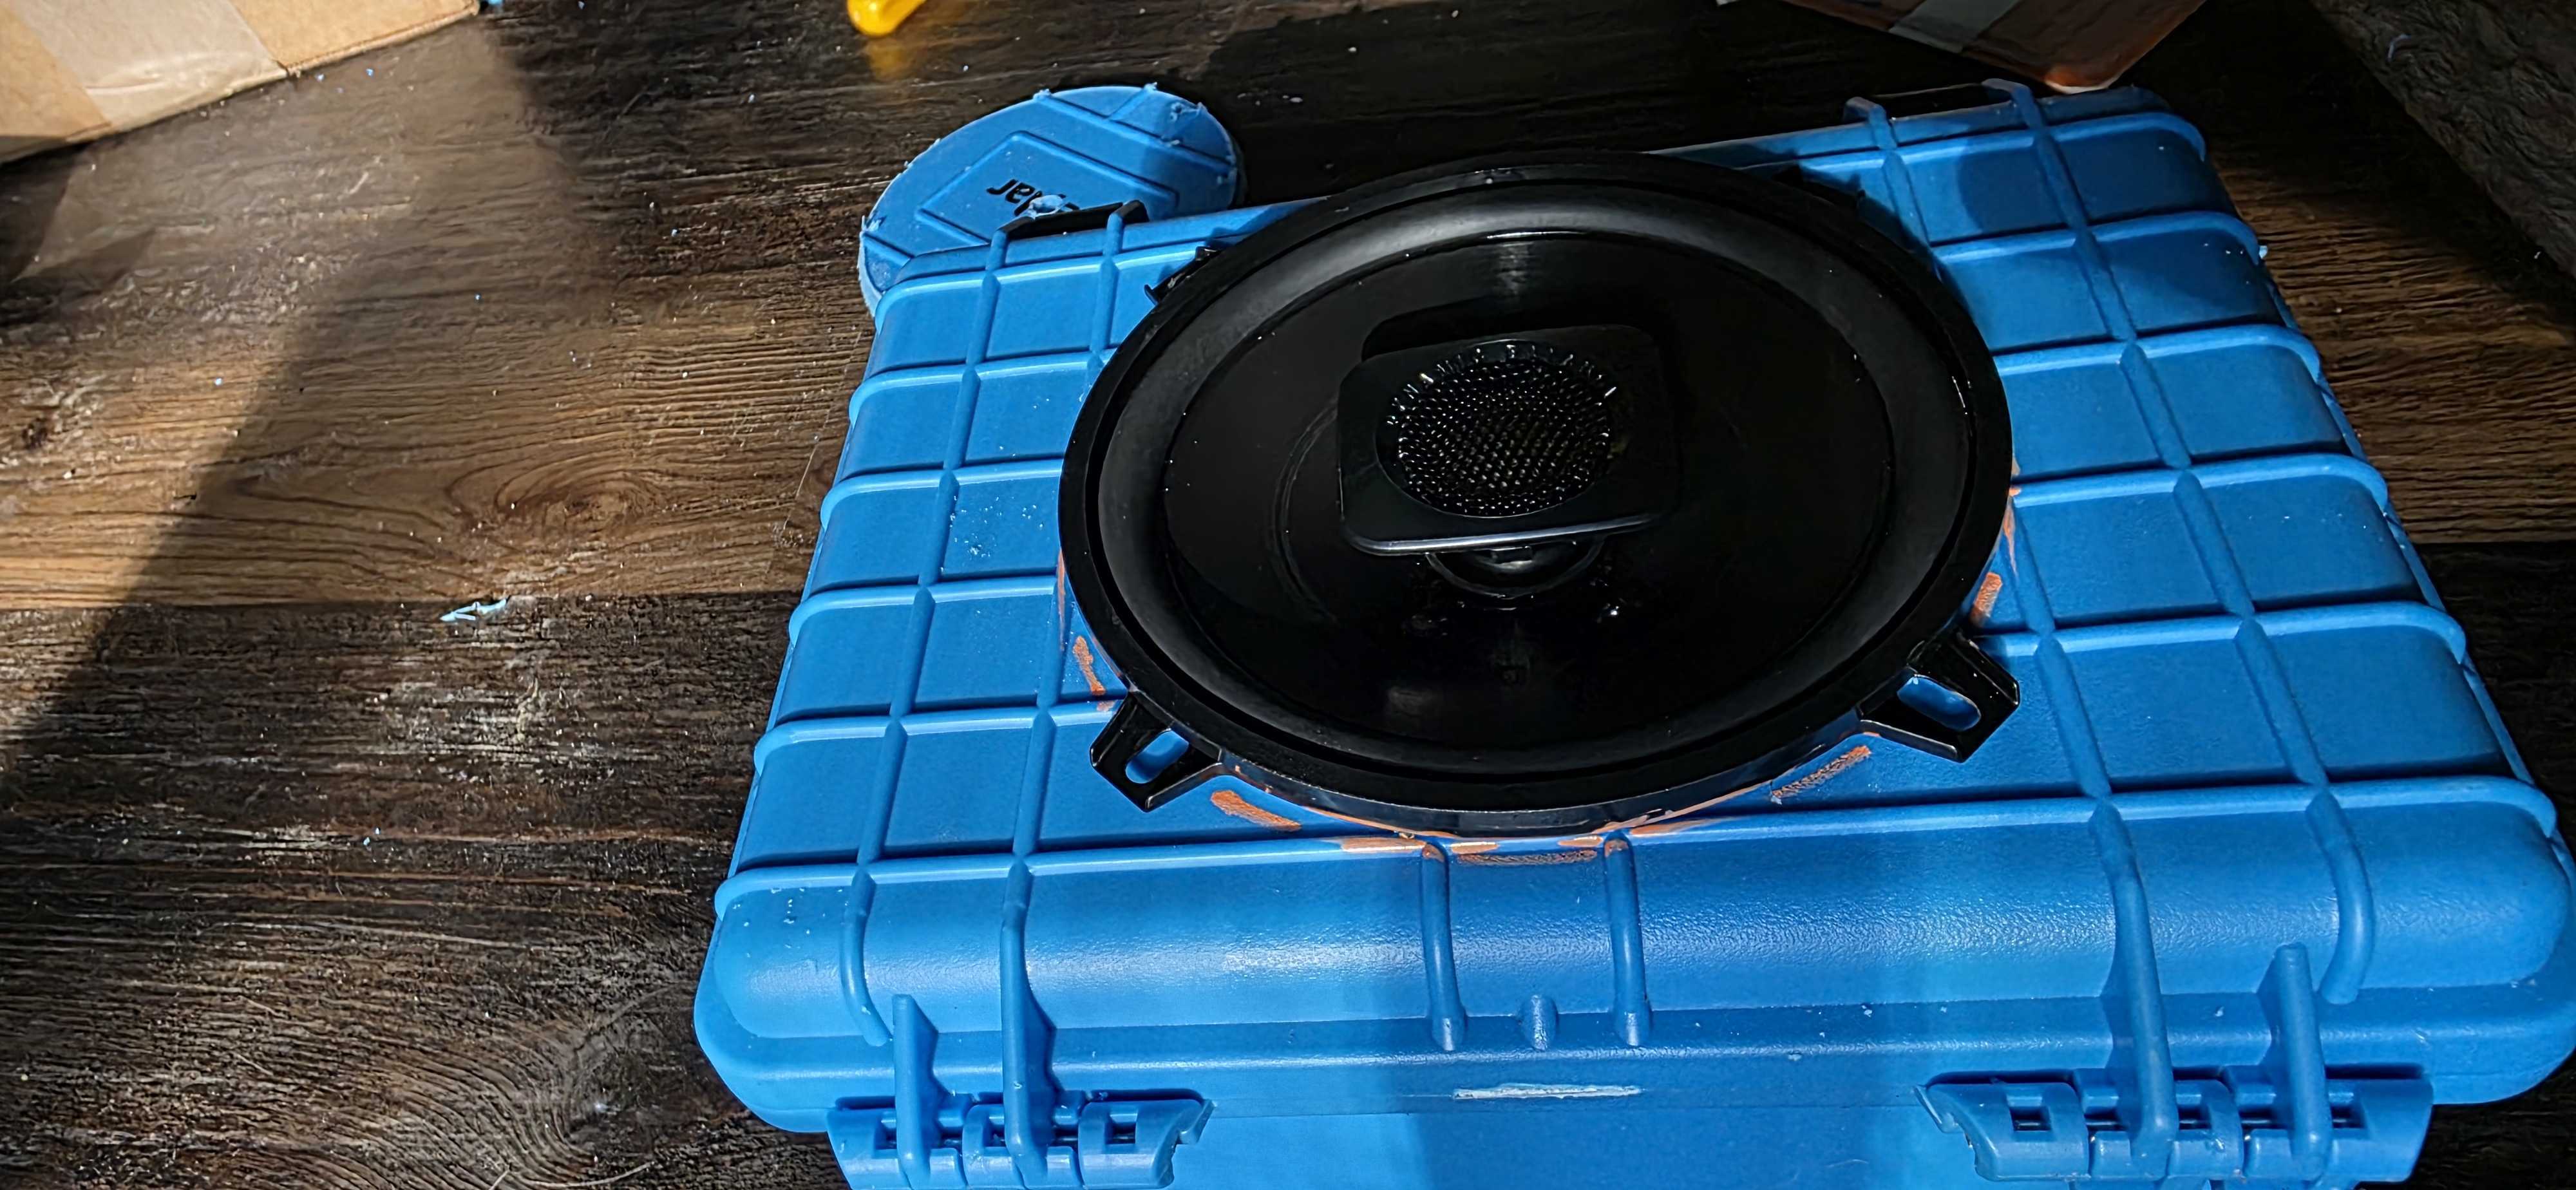
Step 3: Trim the Ribs
Use a Dremel, angle grinder, razor, or even a wood chisel to shave down the marked rib sections until you have a nice flat surface. The speaker should sit snug and flat against the lid.

Pro tip: Lightly run a torch over the shaved areas when you're done. This brings back the glossy look of the case plastic and cleans up the edges.
Step 4: Seal the Speaker
Time to make it air- and water-tight. You’ve got two main options here:
-
Butyl tape: Great at sealing and also allows a little give if the surface isn't perfect. You can even skip trimming the ribs if you use enough tape.
-
Lexel sealant: Thicker and more permanent. Apply a bead between the speaker and the lid and press the speaker in.
If you’re using a spacer, seal between the spacer and the case, then again between the spacer and the speaker.
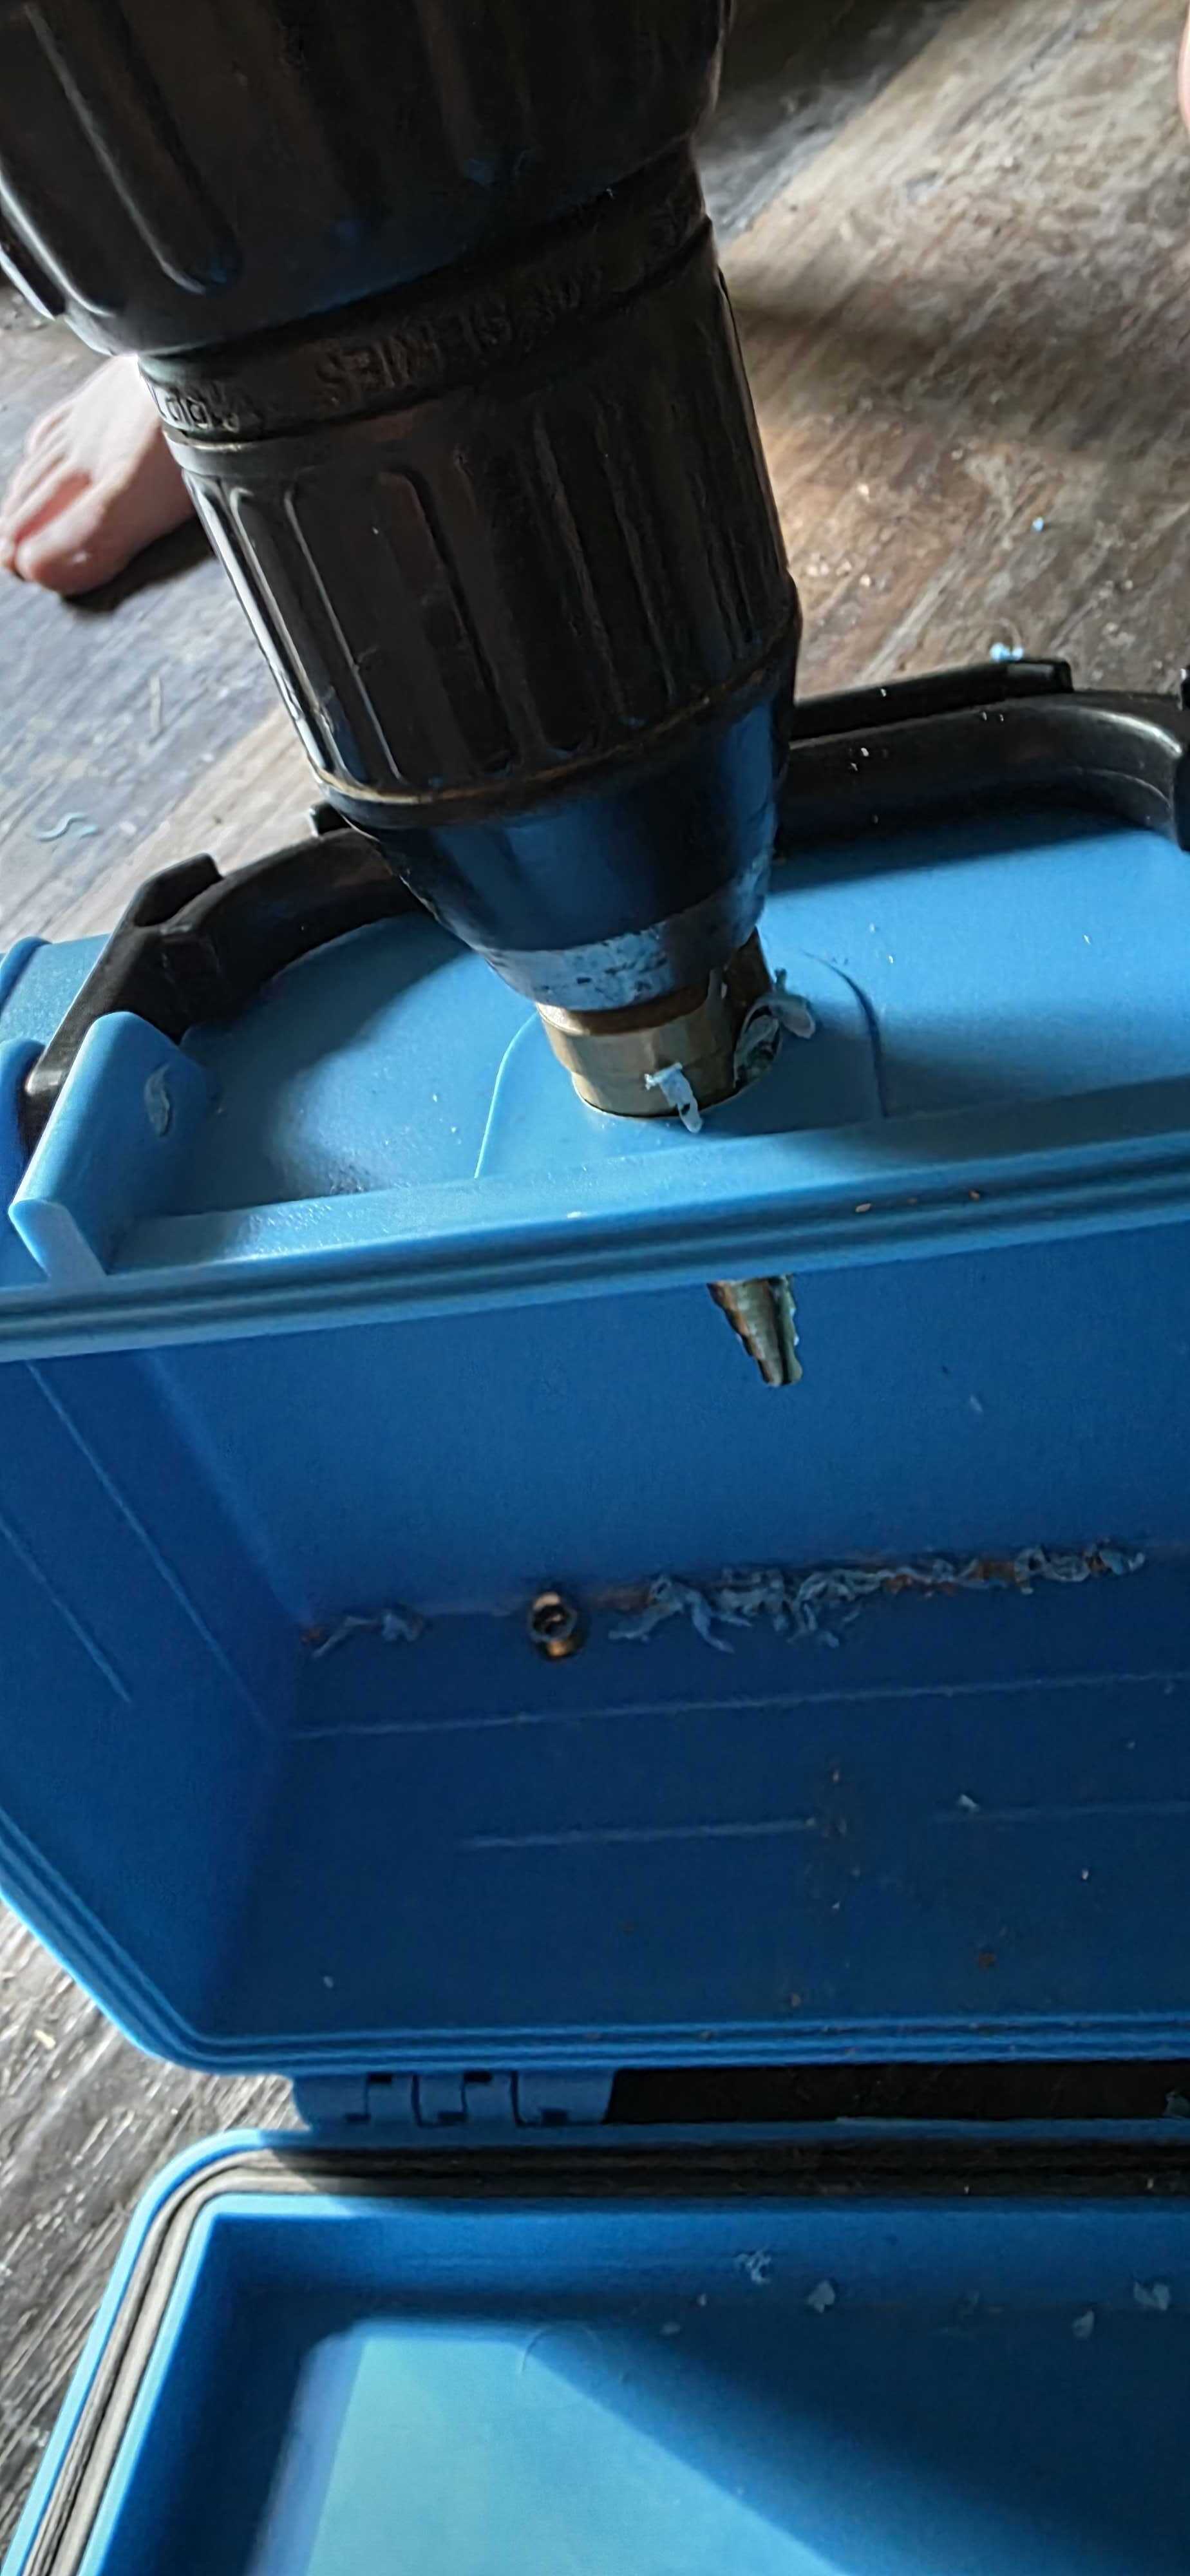
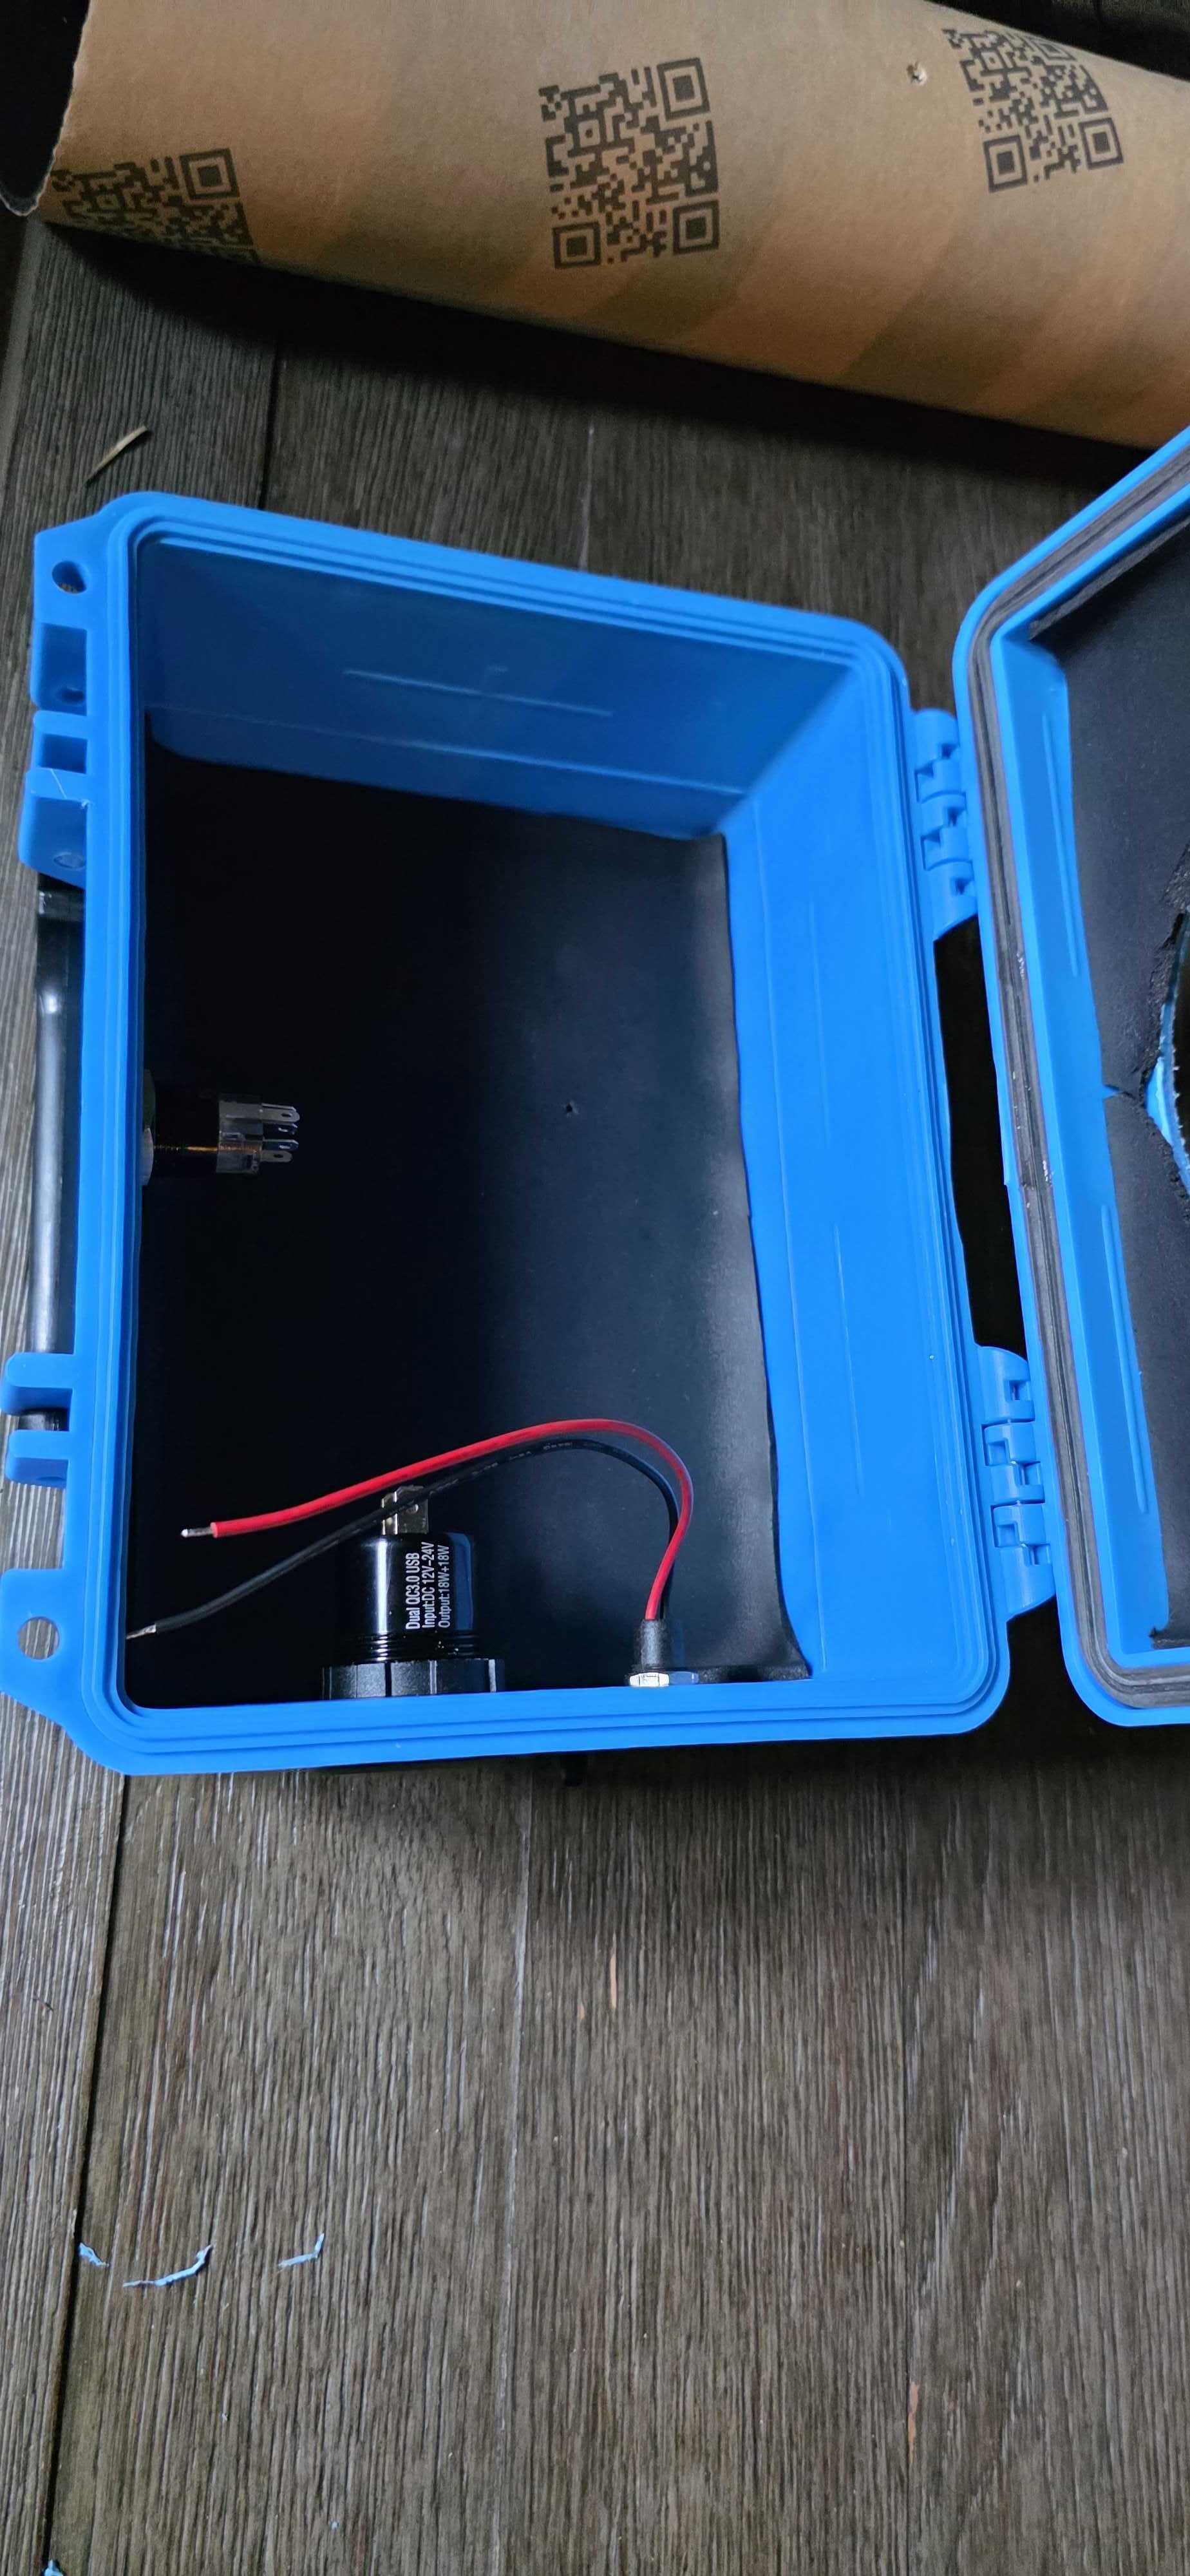
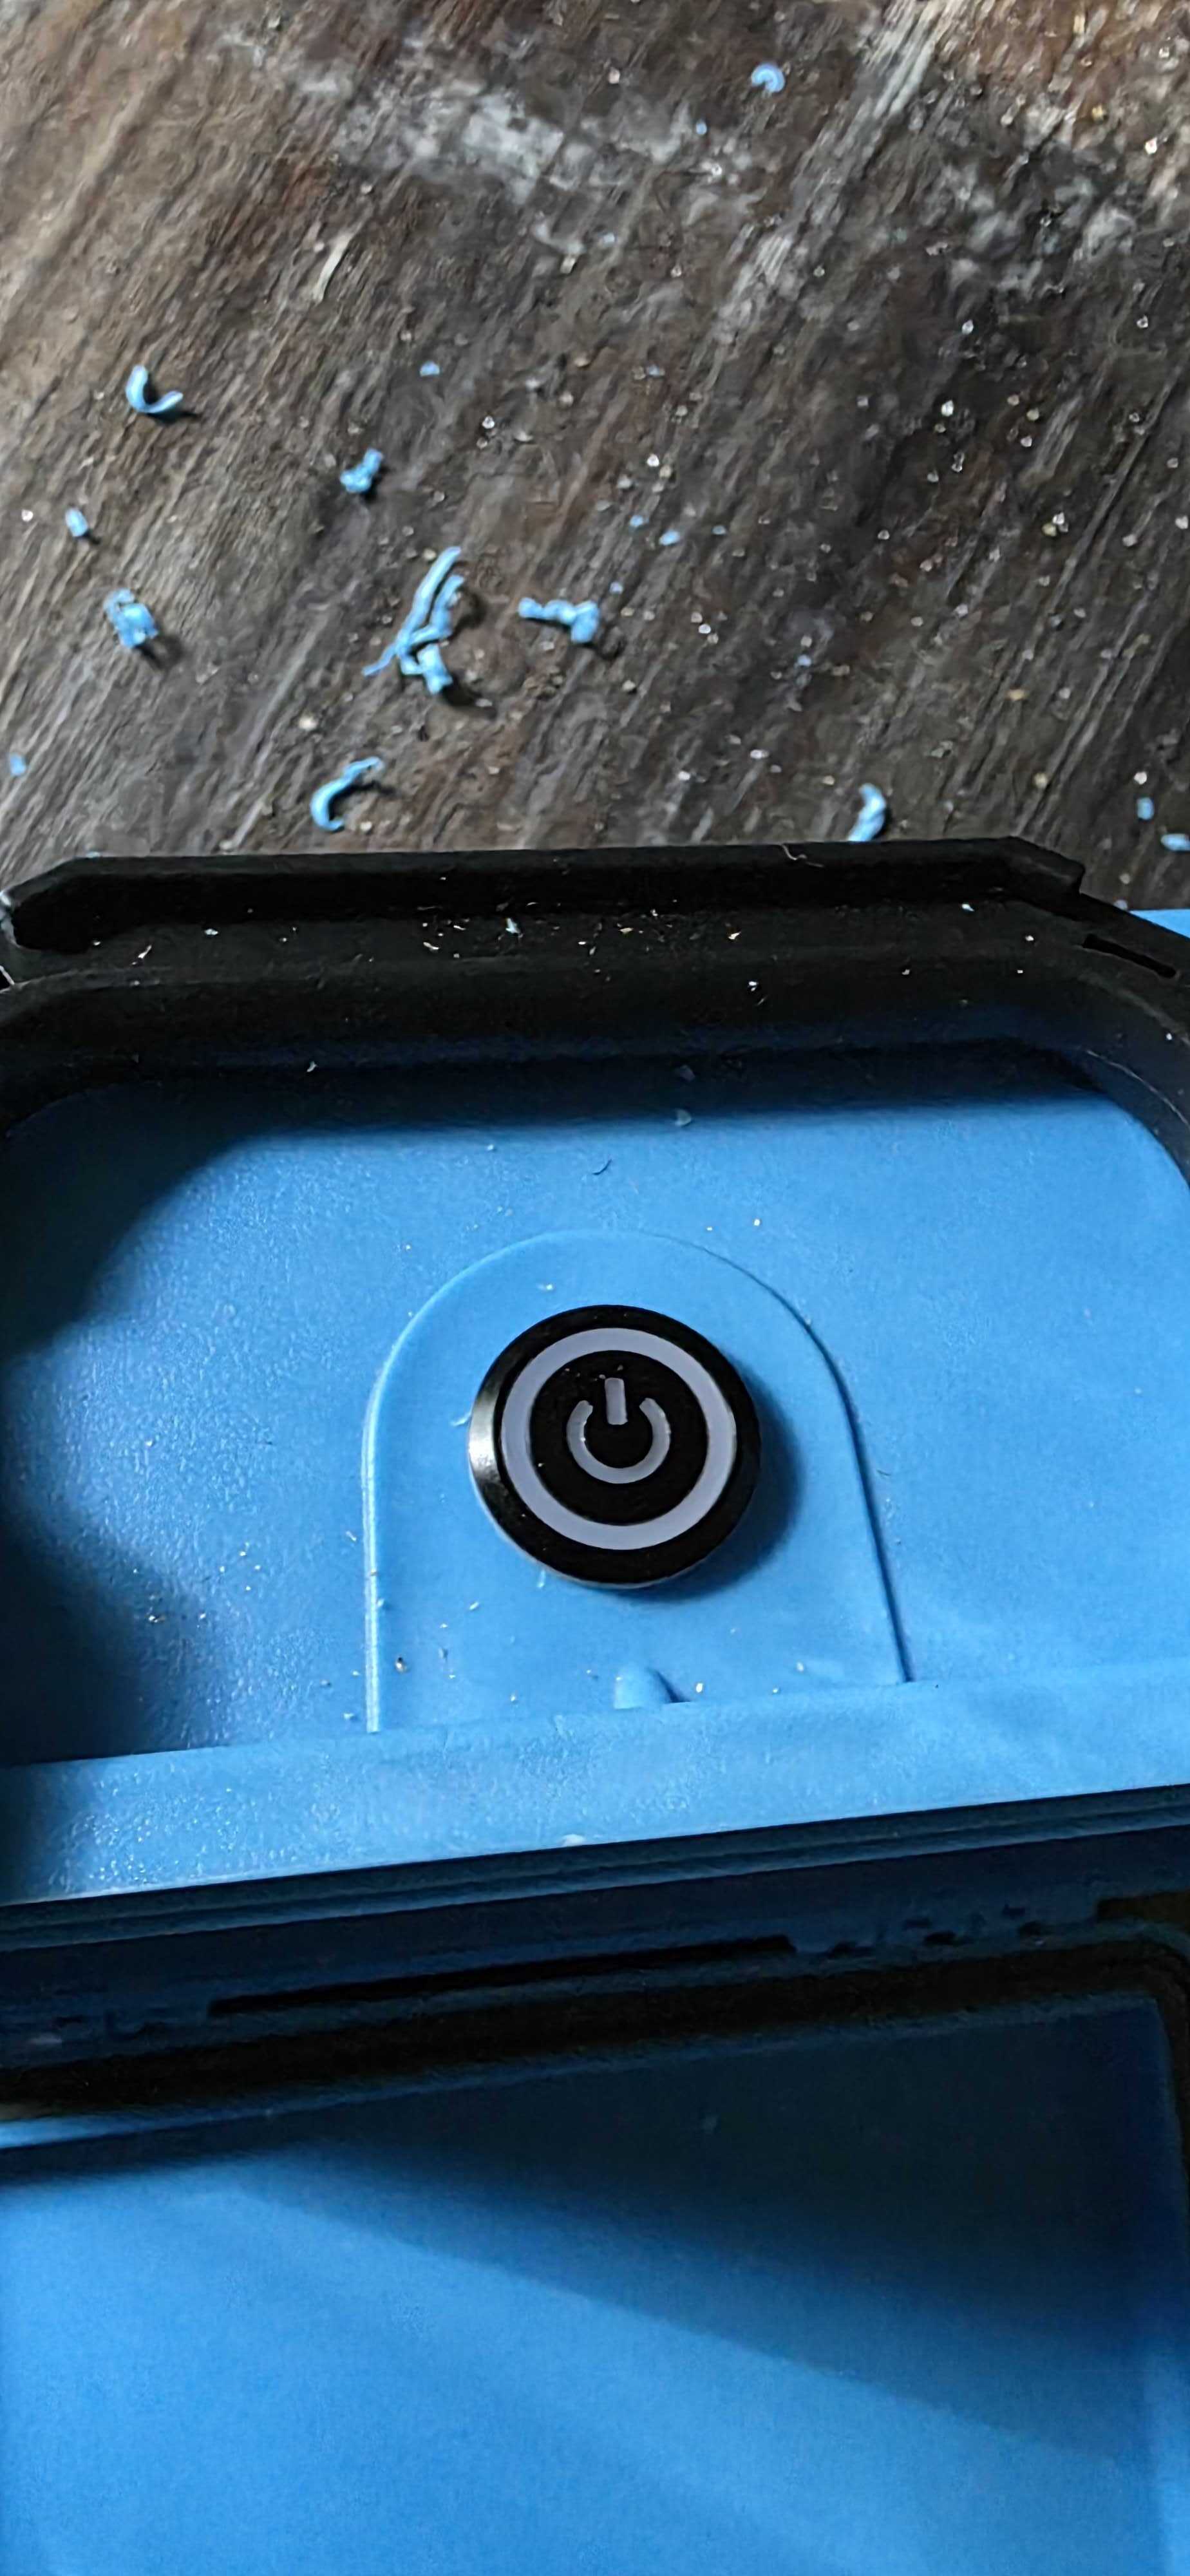
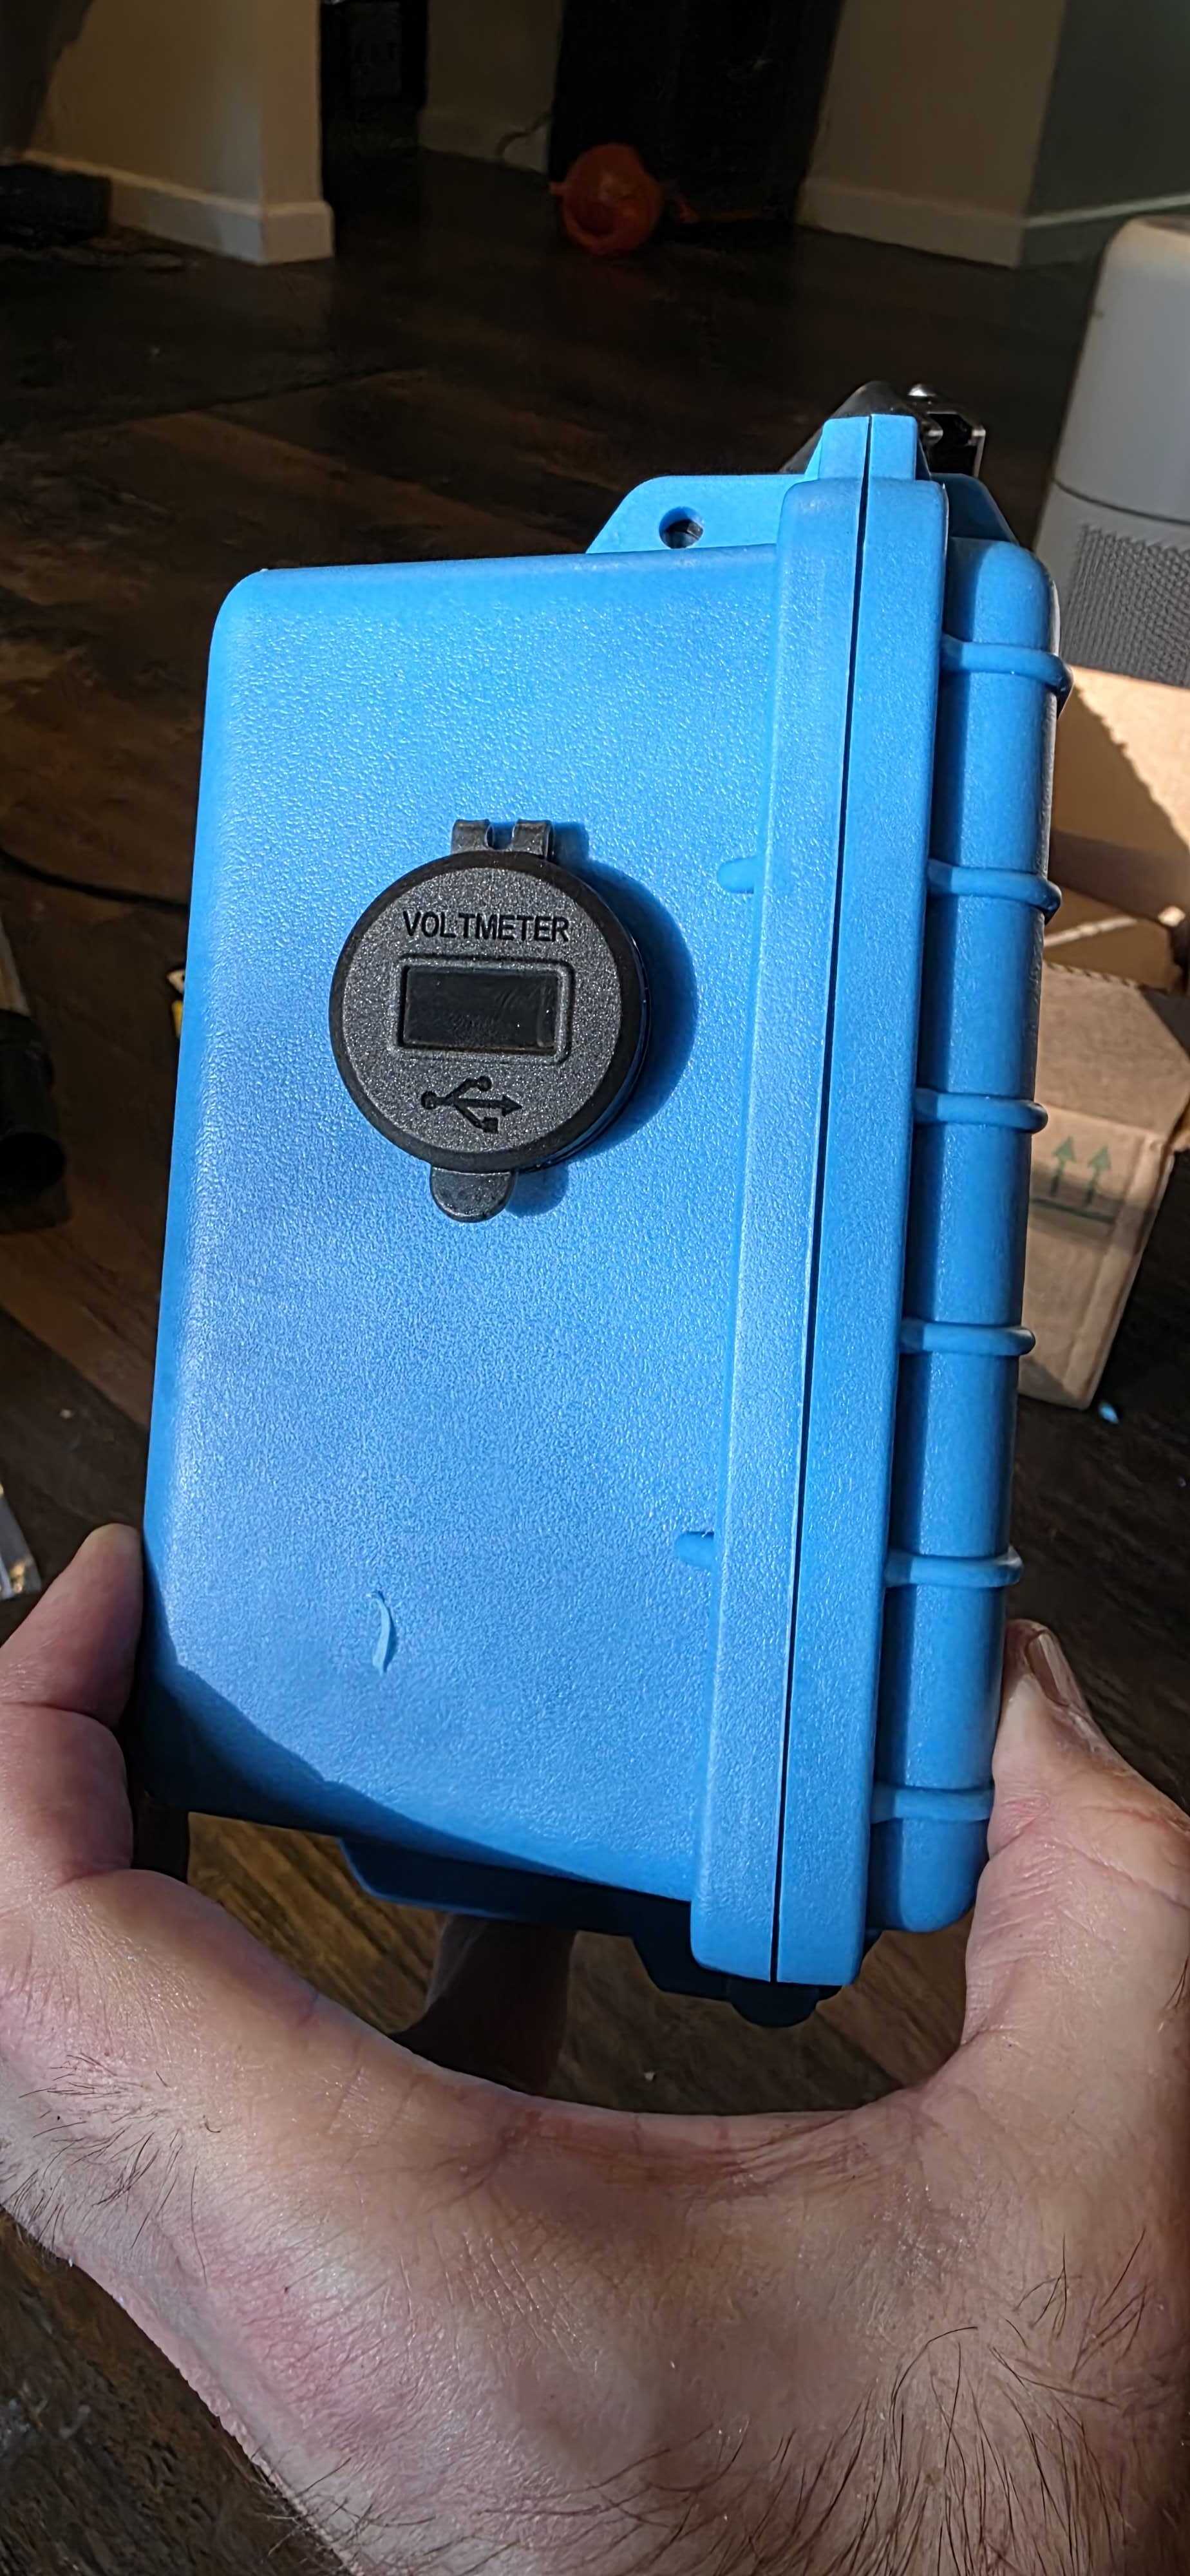
Step 5: Drill Holes for Accessories
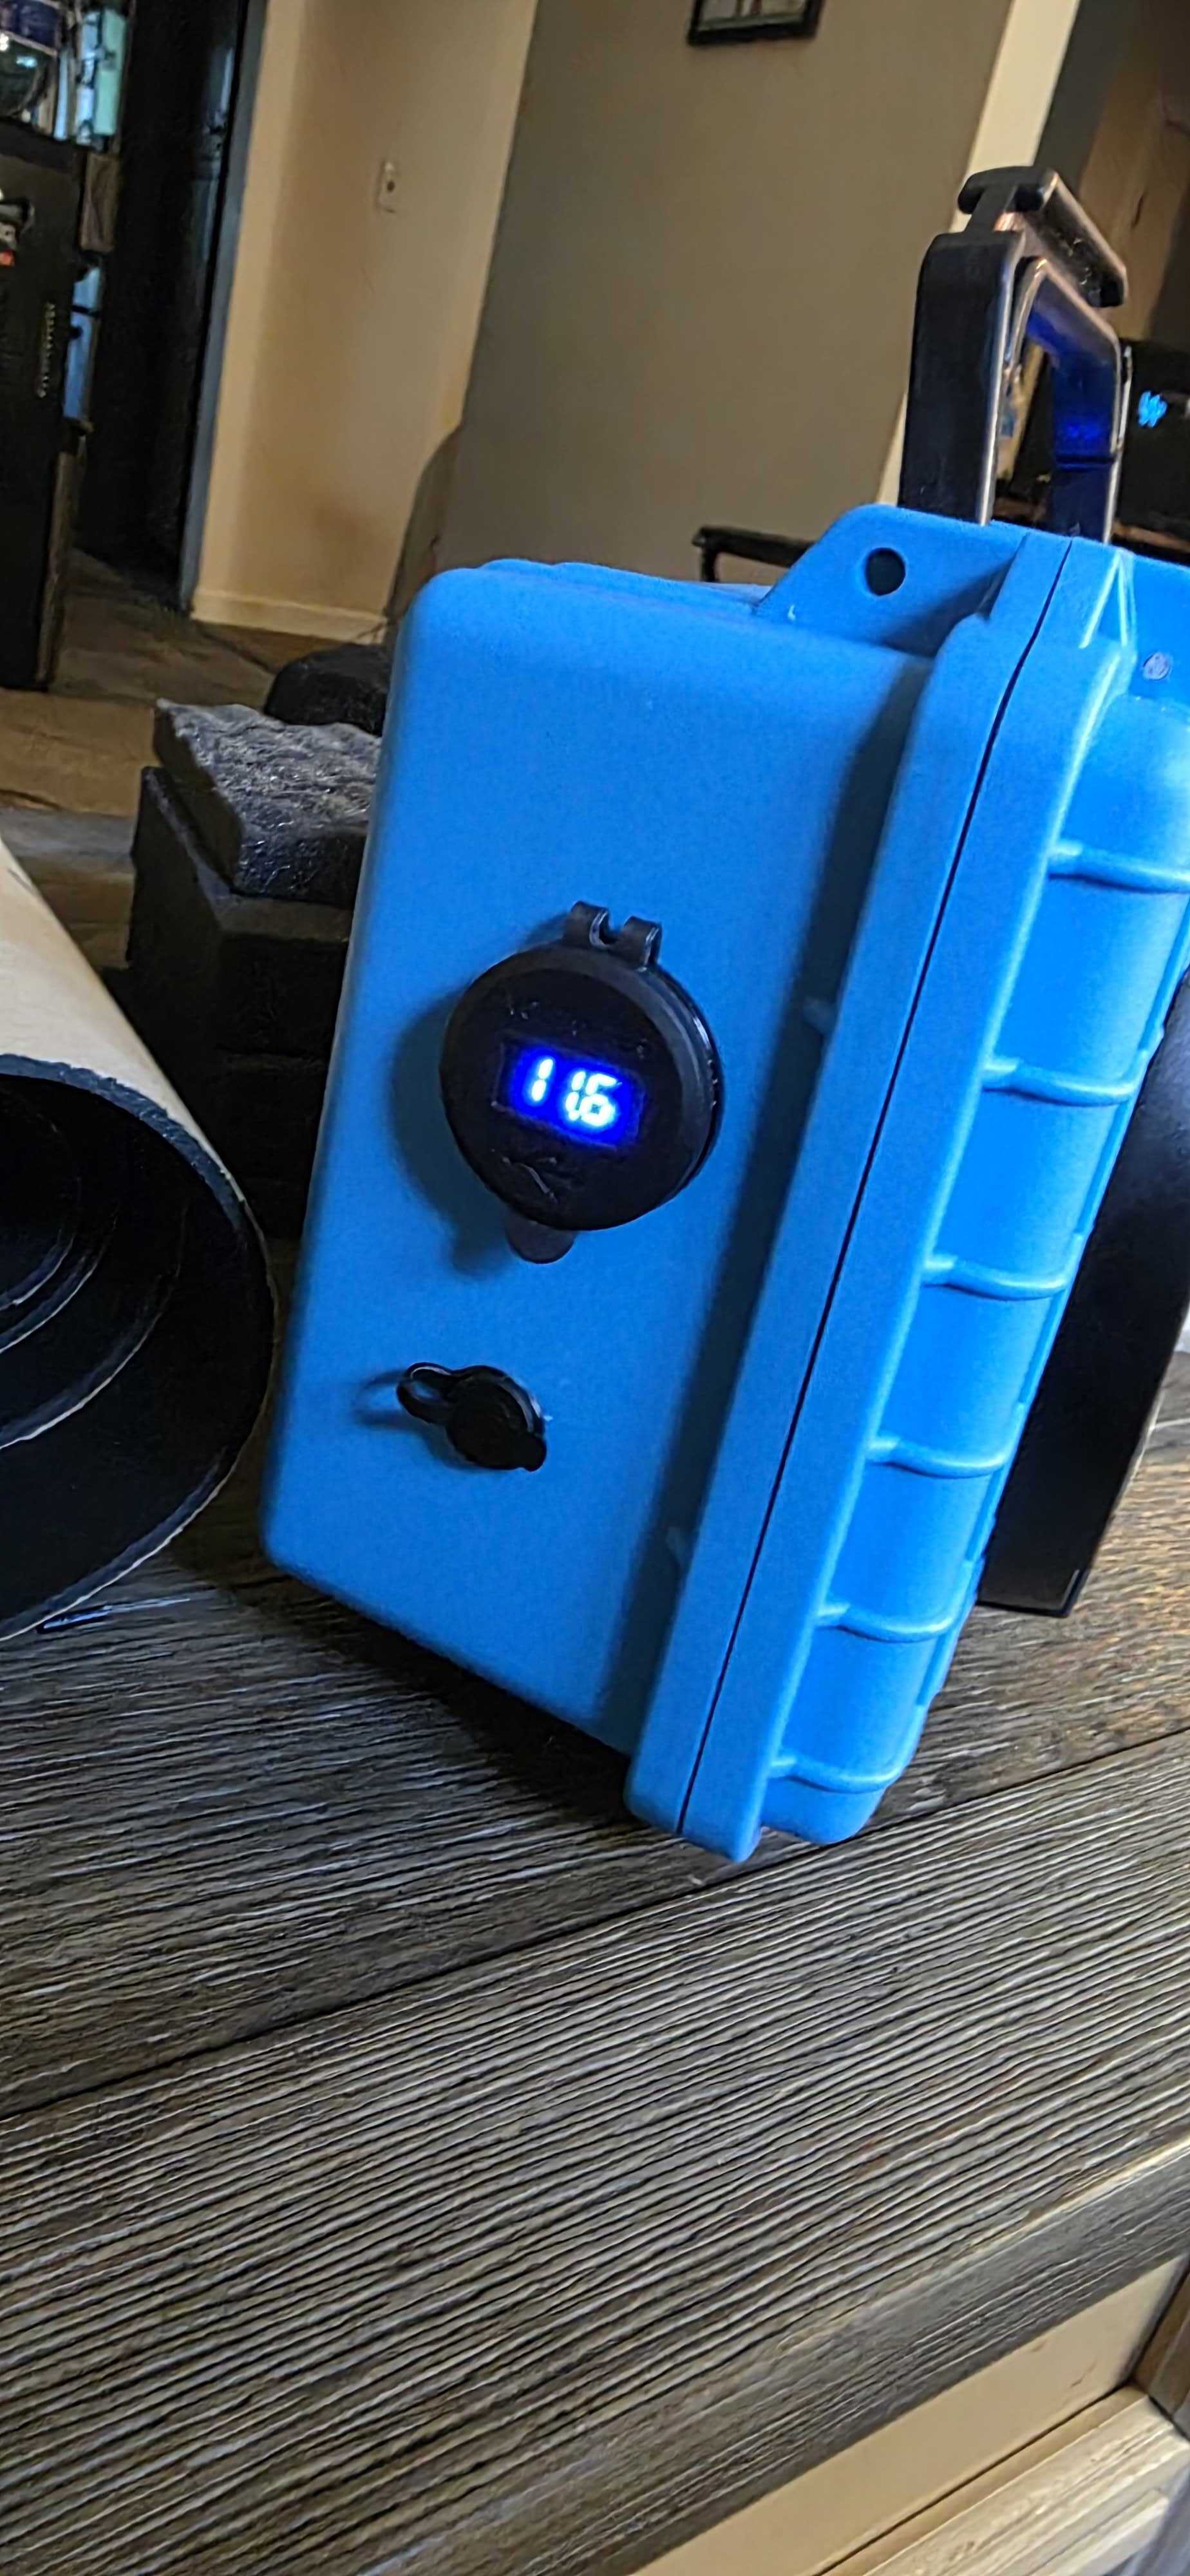
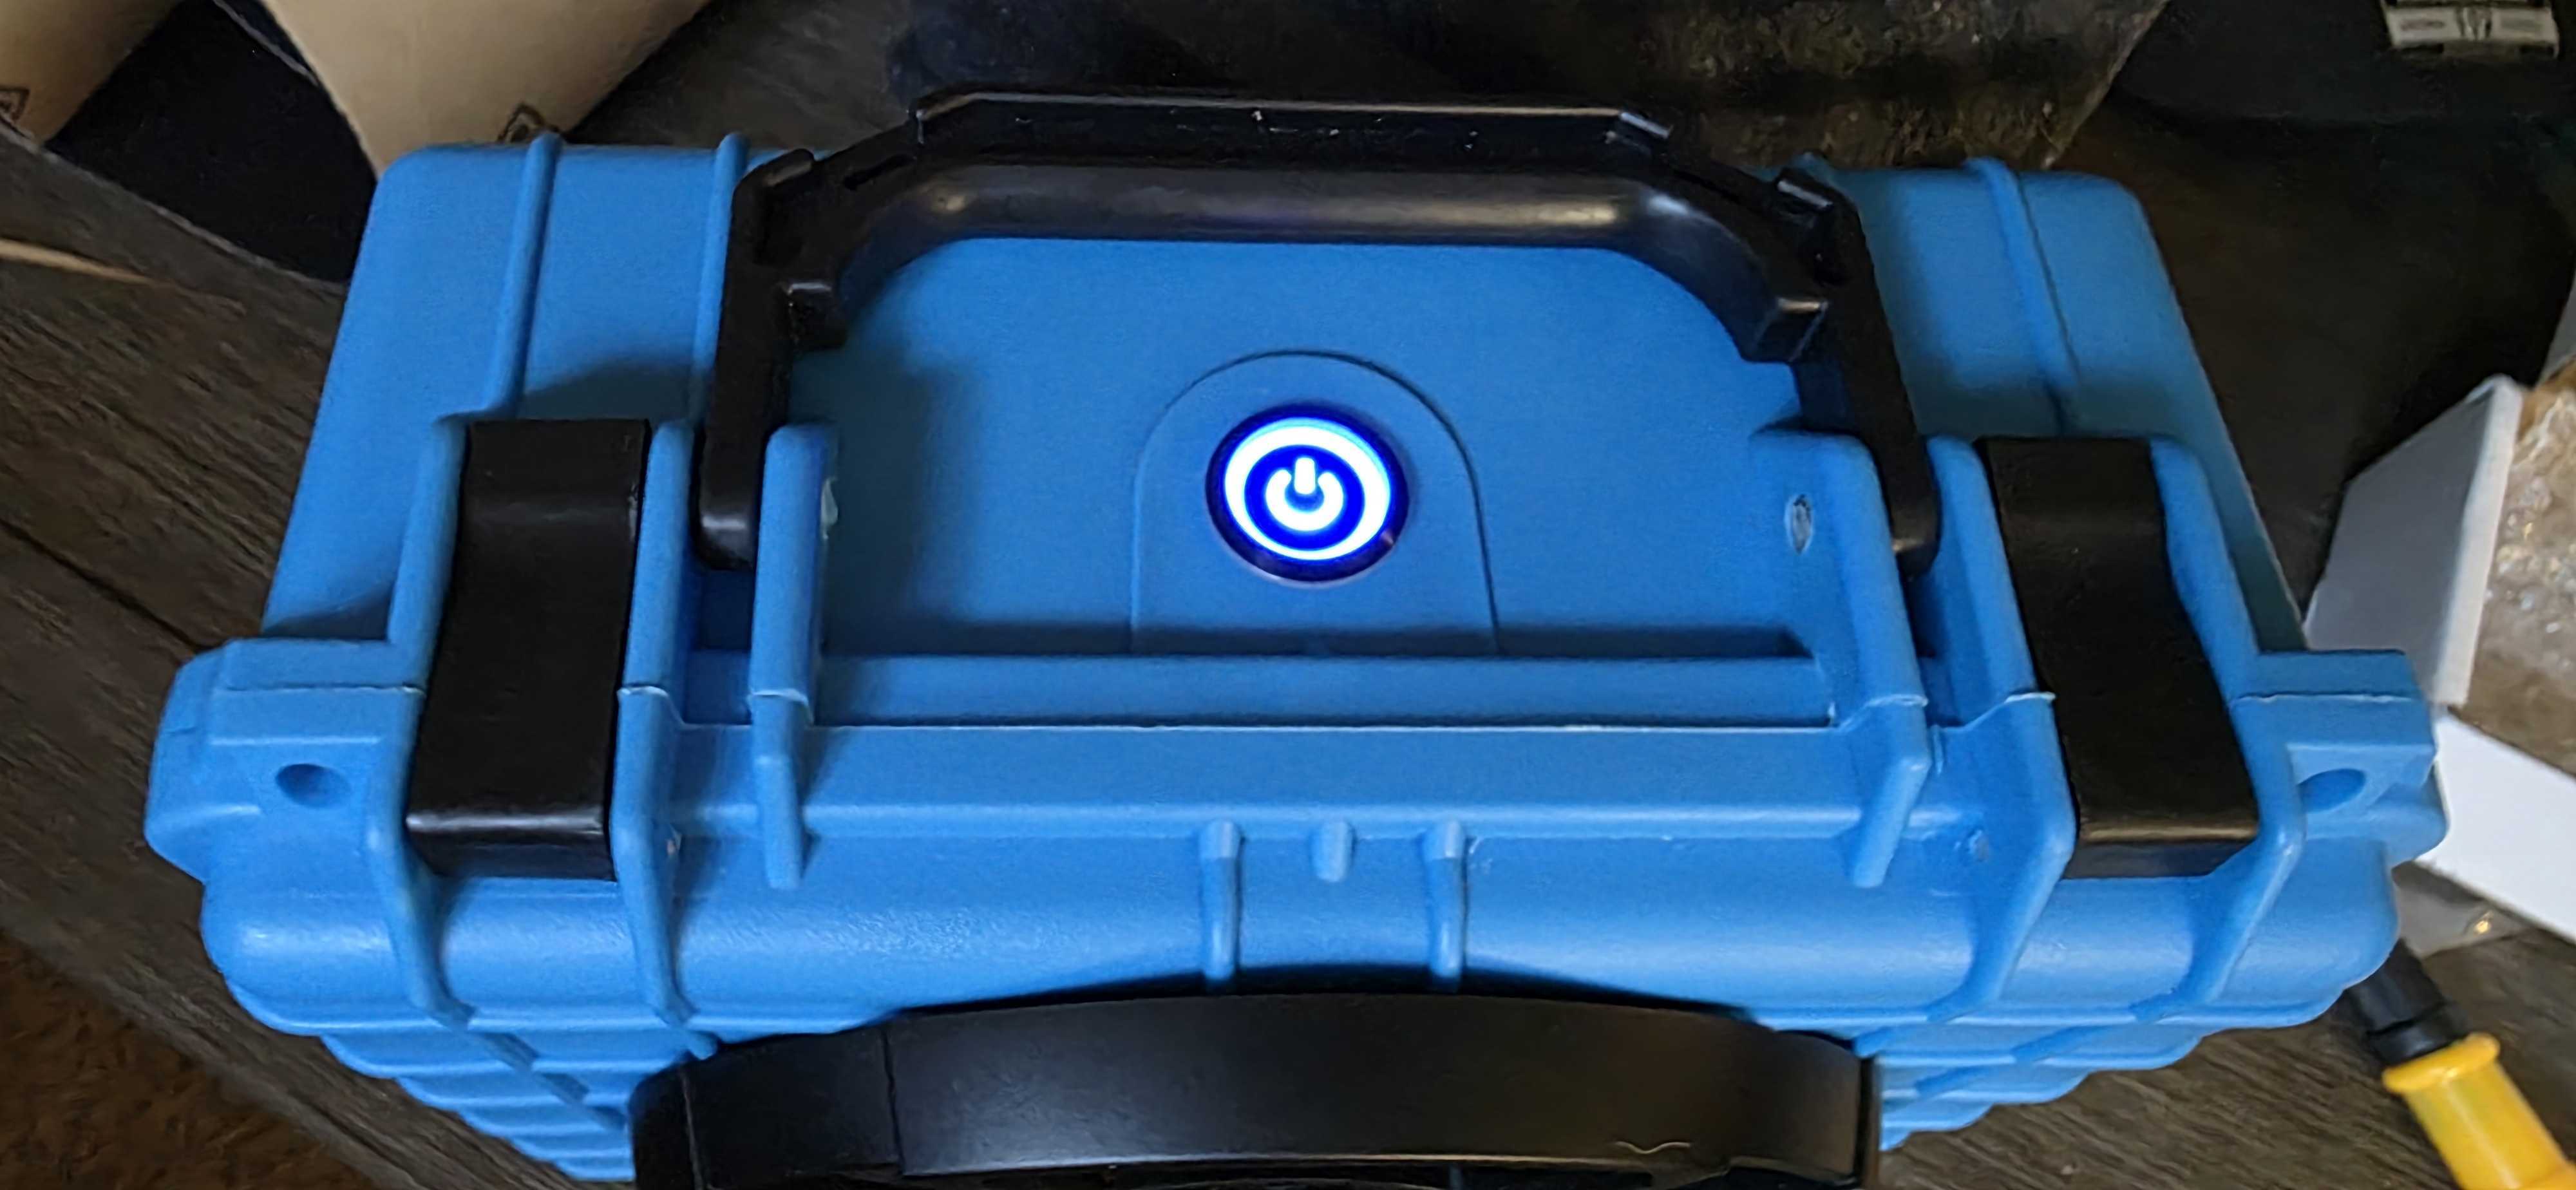
Now’s the time to plan your controls and ports. Use a step bit or hole saw to drill openings for things like a power switch, external charging port, USB socket, or voltmeter. Lay them out before you drill so you don't box yourself into a tight spot.
Step 6: Apply Sound Deadening
Use 80 mil foil-backed butyl sound deadening for best results. Line the inner surfaces of the case to reduce vibrations and improve bass response. Roll it down firmly using a roller tool. This makes a noticeable difference in how clean your boombox sounds.
Step 7: Trim the Deadening Material
Cut out the deadening from the speaker hole, switch holes, and anything else you’ve added. A sharp razor blade or utility knife works well here.
Step 8: Install Accessories
Drop in your switch, voltmeter, and any external ports you added. Dab Lexel around the edges to help seal them against water or dust intrusion. You want this build to survive a bit of rough treatment.
Step 9: Start Wiring
Follow your wiring diagram and start connecting your power switch, amp, battery, and speaker. Keep wires neat and organized. Use shrink tubing or ferrules if you want to go the extra mile.
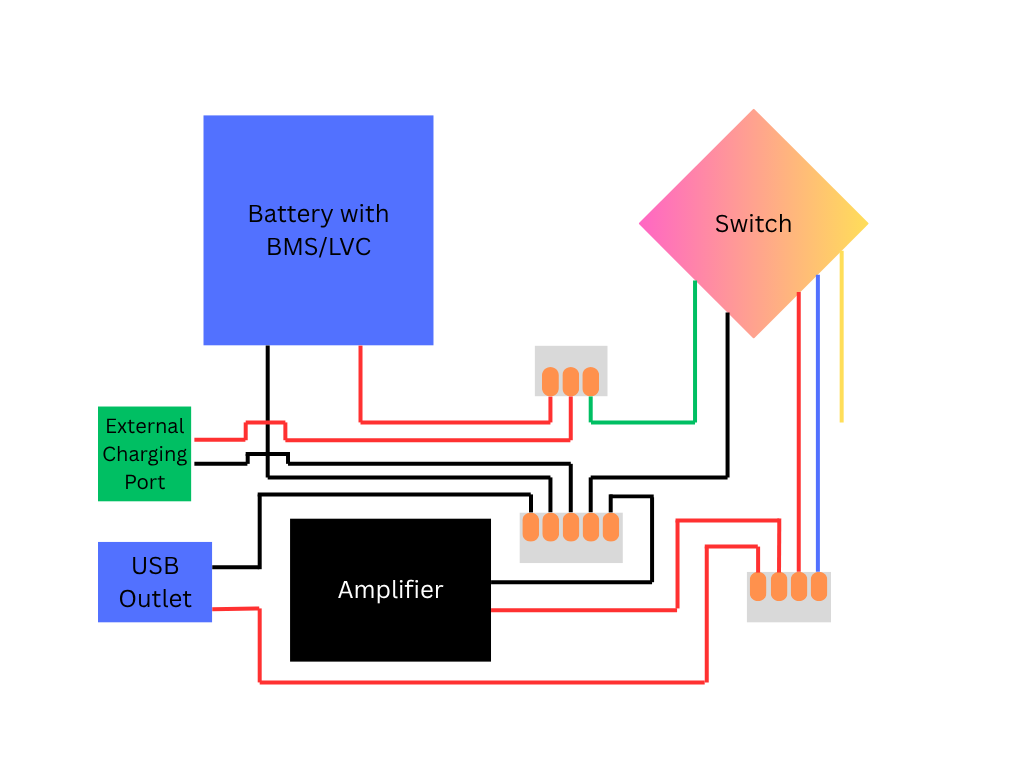
More wiring diagrams can be found here
I have not taken the time to carefully route and clean up my wiring, I'm sure you can do much better than I have!
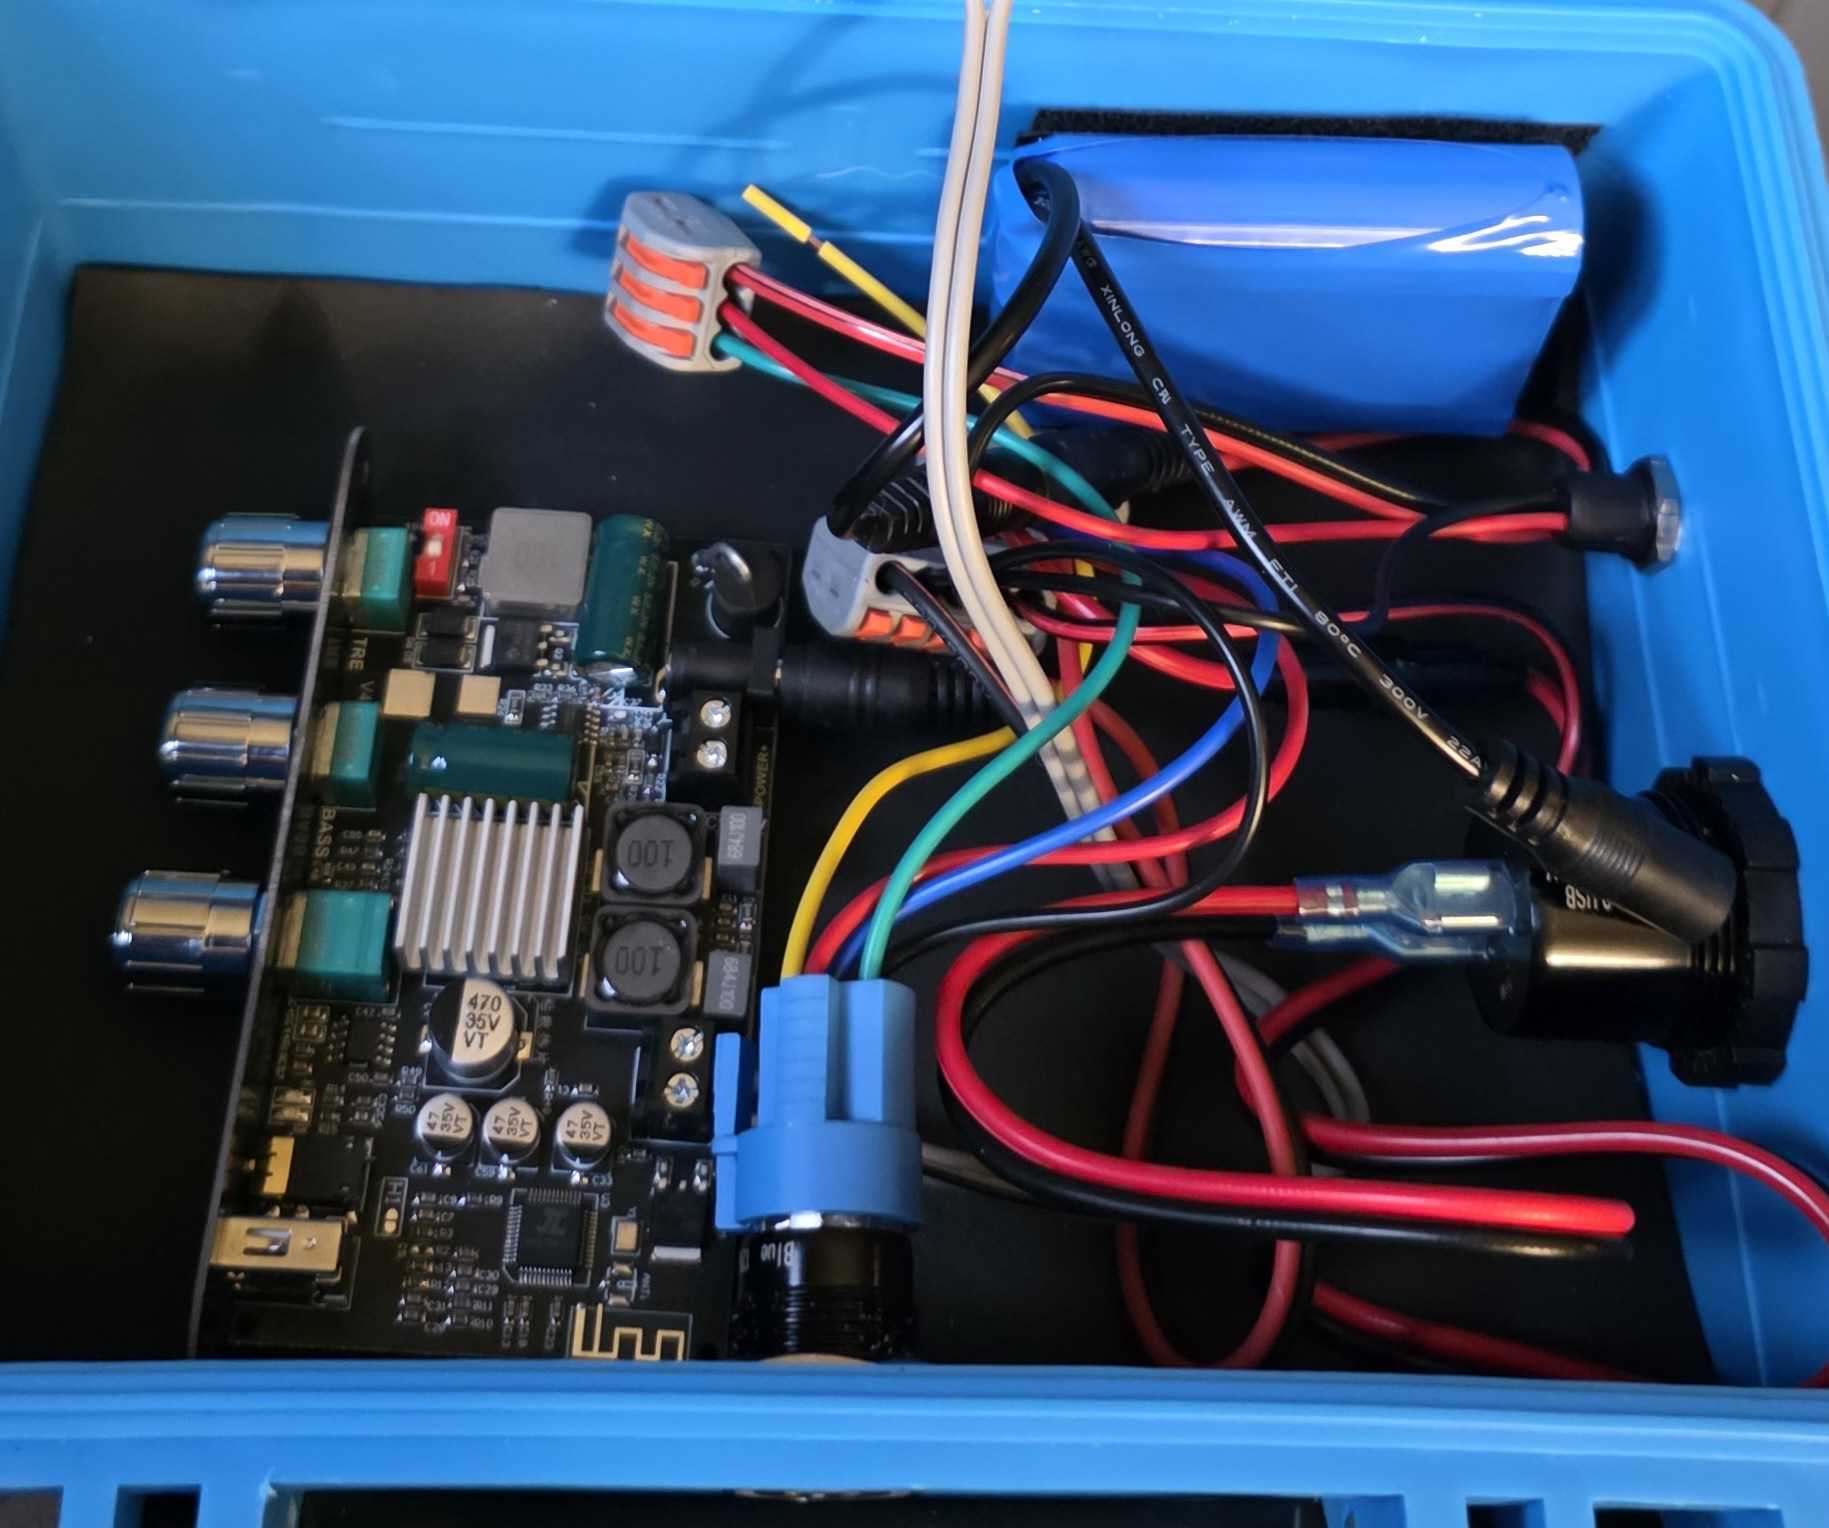
Step 10: Mount Internal Components
Secure your amp, battery, and any boards inside the case. Velcro, double-sided tape, or standoffs all work. Important: Do not let exposed circuit boards touch the foil sound deadening. That can short your components. Use a plastic case or barrier if needed.
Step 11: Test and Tune
Power it up, connect via Bluetooth, and give it a test run. Start with conservative settings:
-
60% treble
-
50% bass
-
50% volume or amp gain
Play something with a wide dynamic range and listen for distortion or rattling. Adjust as needed.
Final Thoughts
This build turns a tough plastic toolbox into a portable speaker that punches above its weight. It’s waterproof, durable, and sounds excellent for the size. You can customize this same approach for other speaker sizes or different cases once you’ve done one.
Got questions or want to see other builds? Let me know and I’ll keep the guides coming.
